Private Label, White Label, Wholesale partnerships available - EU, USA and UK - Free shipping from €75
Microbial Contamination in Labs: Detection and Prevention
A cell culture flask looks normal when it goes into the incubator. Two days later, the medium has shifted in color, the pH is drifting, and a faint haze appears where none should be. The first suspicion usually falls on the cells, the incubator, or the analyst. Often, the source is less obvious: a reagent aliquot opened repeatedly, a bottle thread touched by a glove, or a dispensing line that has carried organisms forward for weeks.
Microbial contamination rarely announces itself at the moment it enters a workflow. It can remain below visual detection, alter assay behavior before turbidity appears, or leave behind endotoxin after bacterial cells have been removed. The World Health Organization treats unsafe food as a major global public health burden, estimating about 600 million illnesses and 420,000 deaths each year, with newer updates reporting 866 million illnesses and 1.52 million deaths in 2021 (WHO food safety overview). Laboratory contamination is a different operating context, but the same principle applies: small control failures can create consequences far beyond the original touchpoint.
Table of Contents
- When Contamination Compromises Your Research
- Understanding Microbial Contamination Sources and Risks
- Hidden Contamination Vectors in Lab Water Systems
- Detection and Testing Methods for Labs
- Prevention Protocols for Reagent and Peptide Handling
- Addressing Persistent Pathogens and Biofilm Risks
- Actionable Contamination Control Checklist
When Contamination Compromises Your Research
A failed experiment often begins with an observation that seems too minor to justify stopping the run. The culture medium has changed color faster than expected. A peptide solution looks slightly cloudy. A control drifts while the treated samples remain within range. If the team continues, the next passage may carry the problem into new flasks, and the resulting dataset becomes difficult to interpret.
The practical damage is familiar. Samples are discarded, assay plates are repeated, animal-study schedules move, and analysts spend hours testing equipment that was never responsible. The most frustrating events leave no clean trail because the laboratory recorded the reagent lot but not the opening date, handler, storage excursion, or identity of the dispensing tool.
Practical rule: A contamination investigation should follow the material, not just the instrument. Trace the reagent from receipt through storage, aliquoting, handling, use, and disposal.
The silent variable in sensitive workflows
Cell-based assays are particularly vulnerable because microorganisms can change nutrient availability, pH, cell metabolism, and apparent response to treatment. Peptide synthesis and reconstitution workflows introduce additional exposure points. A lyophilized powder may be treated as sterile by assumption, yet the vial seal, septum, diluent, needle, or operator can introduce bioburden during transfer.
Low-level contamination can also distort downstream work without producing an obvious visual signal. PCR may amplify unwanted nucleic acid, cell cultures may change behavior before they become visibly cloudy, and repeated use of an opened stock can spread a localized event across an entire experiment series. When the laboratory lacks retain samples or environmental records, the team may be unable to distinguish a contaminated reagent from a technique error.
Mapping the complete reagent lifecycle
Sterile technique remains essential, but it isn't a complete contamination-control system. A laboratory needs a map of every point at which a material can contact air, hands, surfaces, water, tubing, caps, pipettes, or another reagent.
That map should identify:
- Receipt: packaging damage, compromised seals, unclear certificates, and temperature excursions.
- Storage: unsuitable placement, repeated door opening, condensation, and untracked movement.
- Preparation: work-surface cleaning, cabinet status, container disinfection, and aliquoting technique.
- Use: shared pipettes, exposed tips, repeated vial entry, and return of unused material.
- Closeout: disposal, cleaning records, retain samples, and lot-level traceability.
The laboratory manager's priority is to make each transition visible. A checklist can confirm that a task was performed, but only a lifecycle record can show where contamination entered.
Understanding Microbial Contamination Sources and Risks
Microbial contaminants behave differently, so a useful risk assessment starts with classification rather than treating every event as generic “dirt.” Bacteria, fungi, and mycoplasma occupy different niches, grow at different rates, and interfere with research through different mechanisms.
Gram-negative bacteria, including organisms associated with wet environments, are a major concern in aqueous reagents and water systems. Pseudomonas can persist in low-nutrient environments, and bacterial components such as endotoxin may continue to affect sensitive assays even after disinfection has killed the cells. Gram-positive bacteria can arrive through handling, dust, skin contact, or inadequately cleaned equipment, then survive on dry surfaces until a suitable liquid environment becomes available.
Fungi create a different problem. Yeasts can multiply in nutrient-containing solutions, while mold spores may remain on packaging and laboratory surfaces, then become airborne during opening or transfer. A clean-looking bench doesn't prove that a bottle exterior, cap underside, or airflow path is free of spores.
Mycoplasma is especially deceptive in cell culture. Because it lacks a conventional cell wall, some antibacterial strategies don't address it, and its small size and low visual profile make routine observation unreliable. A culture can show altered growth or metabolism before staff recognize a classic contamination pattern.
| Contaminant Type | Common Sources | Research Risks |
|---|---|---|
| Gram-negative bacteria | Water loops, dispensing tubing, wet surfaces, contaminated diluents, repeated vial entry | Endotoxin interference, pH changes, turbidity, altered cell behavior, invalid assays |
| Gram-positive bacteria | Operator contact, packaging, dust, shared tools, inadequately cleaned equipment | Culture overgrowth, nutrient competition, inconsistent assay performance |
| Yeasts and molds | Air exposure, bottle exteriors, closures, storage shelves, aerosolized spores | Visible growth, altered reagent chemistry, particulate contamination, compromised cultures |
| Mycoplasma | Cell cultures, contaminated supplements, shared handling areas, inadequately controlled stocks | Subtle metabolic changes, abnormal growth, unreliable cell-based data |
Why peptide workflows deserve separate controls
Peptide reconstitution is often treated as a simple dilution step, but it combines a sterile container, a diluent, a needle or transfer device, and repeated handling. A damaged septum can create risk before the vial reaches the bench. Once opened, every withdrawal creates another opportunity for contact contamination, especially when the same container serves multiple experiments.
The risk increases when a contaminated solution moves into PCR preparation, cell culture, or animal work. A small initial burden can become distributed through repeated passages, shared media, or multiple replicate preparations. The resulting failure may appear as biological variability rather than a microbiological event.
The WHO's historical burden analysis illustrates why microbial hazards need structured measurement rather than informal observation. Its 2015 analysis attributed 29% of the burden across 22 studied diseases to contaminated food, representing about 582 million cases and 25.2 million DALYs in 2010 (WHO global burden analysis). Laboratory teams aren't measuring the same population burden, but they face the same analytical challenge: contamination must be connected to a source, a route, and an outcome.
Hidden Contamination Vectors in Lab Water Systems
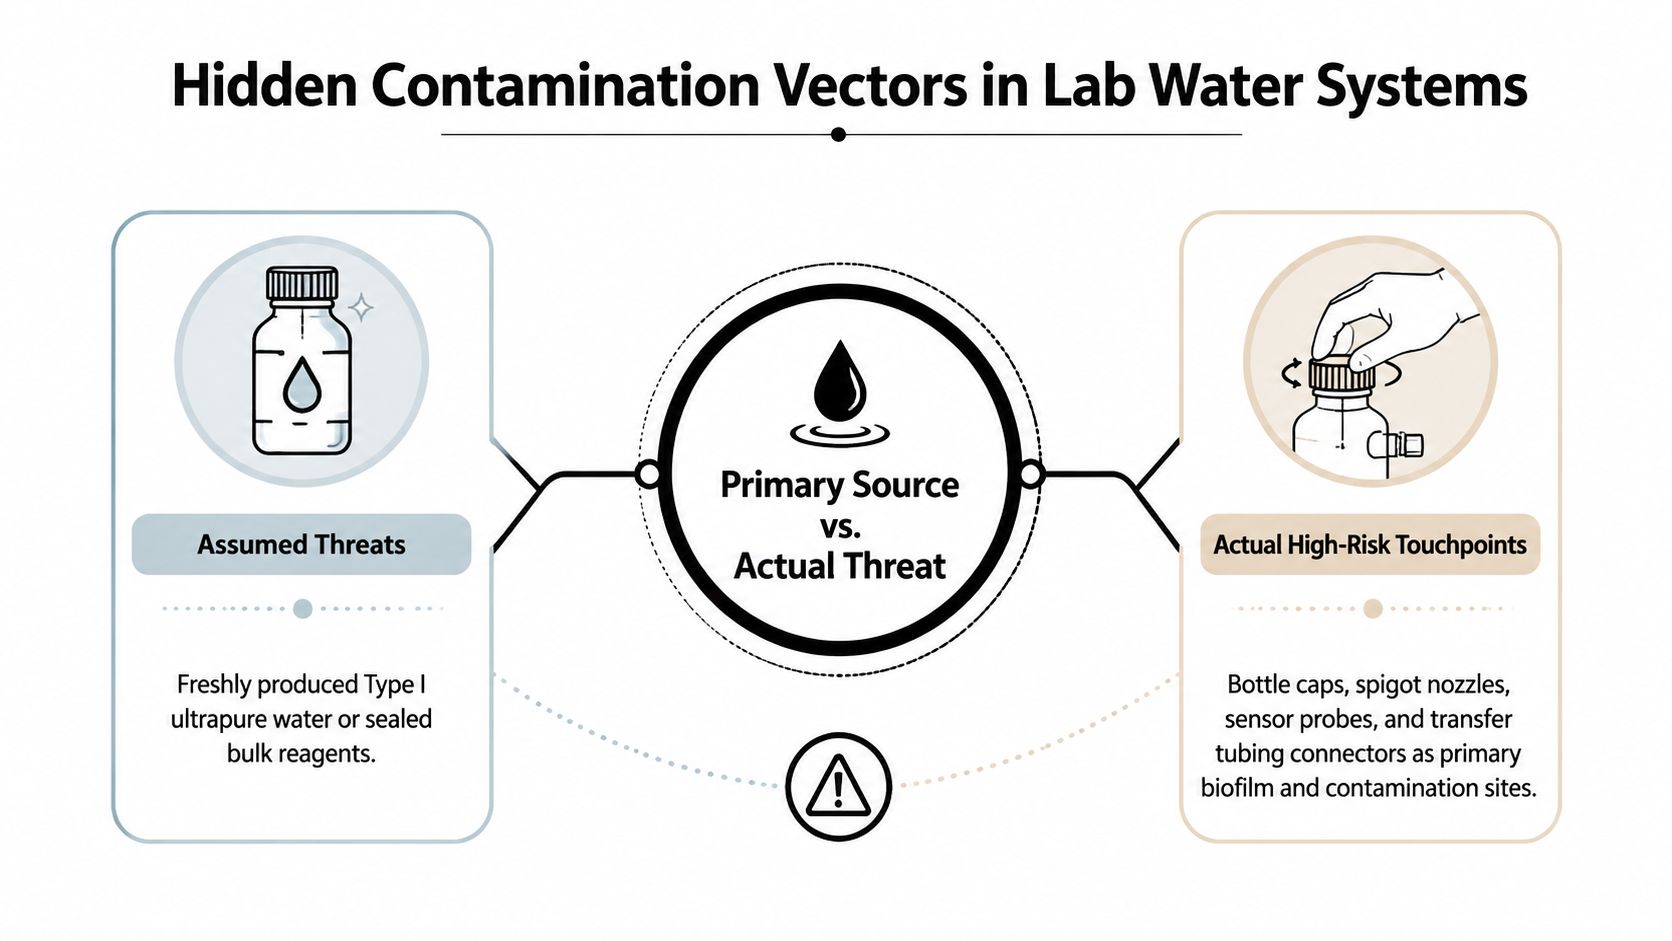
Freshly produced Type I ultrapure water attracts attention because it appears to be the obvious contamination risk. The more persistent threat may sit downstream, on the bottle cap, dispensing nozzle, connector, reservoir wall, or internal tubing.
A 2025 hospital study in Addis Ababa found E. coli in 66.7% of all samples, with detection on 100% of tap handles compared with 31.6% of water samples (Addis Ababa hospital study). The study also reported that organisms including Staphylococcus aureus, Klebsiella, Shigella, and Salmonella were more common on swabs than in water. The operational lesson is direct: testing the liquid alone can miss the surface that transfers contamination into the workflow.
Where exposure enters the system
Bottle threads retain droplets and residue. Nozzles collect deposits around outlets. Gloves touch caps, then touch pipettes, keyboards, and other containers. Pipette tips left exposed can collect airborne material before they ever contact a sample. A sealed bulk reagent can therefore become contaminated during dispensing, even when the original container passed incoming quality checks.
Premise plumbing creates another layer of risk. Water purification reservoirs, dead legs, gaskets, sensor probes, and automated dispenser tubing can provide protected sites where organisms persist and periodically shed into the output. Repeated opening also contaminates bottle headspace, allowing airborne organisms to settle on liquid-contact surfaces during storage.
The water system needs a surface-based monitoring plan, not only source-water testing. That means swabbing high-touch components, checking tubing and connectors during maintenance, and examining how operators dispense material. For workflows requiring tightly controlled water quality, laboratories can also review guidance on water for injection while defining the specific quality and sterility requirements for their application.
Detection and Testing Methods for Labs
A contamination investigation should begin with the fastest useful observation, then escalate only when the evidence requires it. Visual inspection is valuable because it can stop a compromised workflow before more material is used. Staff should check for turbidity, particles, color change, unusual odor, precipitate, and unexpected pH drift in reagent stocks and peptide solutions.
Visual inspection cannot rule out low-level contamination. ATP bioluminescence adds a rapid surface screen for benches, biosafety cabinets, pipettes, shelving, and dispenser outlets. It measures biological material associated with ATP, so it provides a useful cleanliness signal, but it doesn't identify the organism or prove that a liquid is sterile.
Matching the method to the question
Culture-based testing remains important for water systems and suspected reagent contamination. Tryptic soy agar can support broad bacterial recovery, Sabouraud dextrose agar is useful for fungi and yeasts, and MacConkey agar helps investigate Gram-negative organisms. Colony appearance can guide the investigation, but identification shouldn't rely on morphology alone.
Endotoxin testing answers a different question. LAL and recombinant Factor C assays can identify endotoxin associated with Gram-negative contamination, including situations where viable organisms are no longer recoverable. Laboratories handling injectable-grade peptide workflows can use the endotoxin testing guide to distinguish endotoxin control from sterility testing.
For non-microbial water parameters, a laboratory may also compare water quality meters when selecting tools for routine conductivity or related screening. Such meters don't replace microbial culture, ATP testing, or endotoxin assays. They answer a different quality question.
| Method | Turnaround Time | Sensitivity | Best Use Case | Limitation |
|---|---|---|---|---|
| Visual inspection | Immediate | Detects obvious change | Triage of stocks and solutions | Misses low-level or nonvisible contamination |
| ATP swabbing | Rapid | Detects biological residue | Routine surface monitoring | Doesn't identify species or establish viability |
| Culture on selective media | Requires incubation | Recovers cultivable organisms | Water, surfaces, and aliquot verification | Misses viable but nonculturable organisms |
| LAL or recombinant Factor C | Assay-dependent | Detects endotoxin | Injectable-grade or endotoxin-sensitive workflows | Doesn't identify the source organism |
| 16S rRNA sequencing | Laboratory-dependent | Broad bacterial identification | Recurring or complex bacterial events | May not resolve every species or indicate viability |
| MALDI-TOF | Requires suitable isolate | Rapid isolate identification | Confirmed cultured colonies | Depends on recovery and reference-library quality |
Building a workable escalation path
A sensible sequence is visual triage, quarantine, surface and liquid sampling, culture or endotoxin testing, then molecular identification when recurrence continues. 16S rRNA sequencing and MALDI-TOF are most useful when the laboratory needs to connect repeated events to a specific reservoir or distinguish multiple isolates.
Environmental monitoring should include scheduled swabs of dispensing nozzles, bottle-contact surfaces, cabinet work zones, and water-system components. The schedule should also include event-based sampling after maintenance, filter replacement, unusual results, or a prolonged period of non-use.
Prevention Protocols for Reagent and Peptide Handling
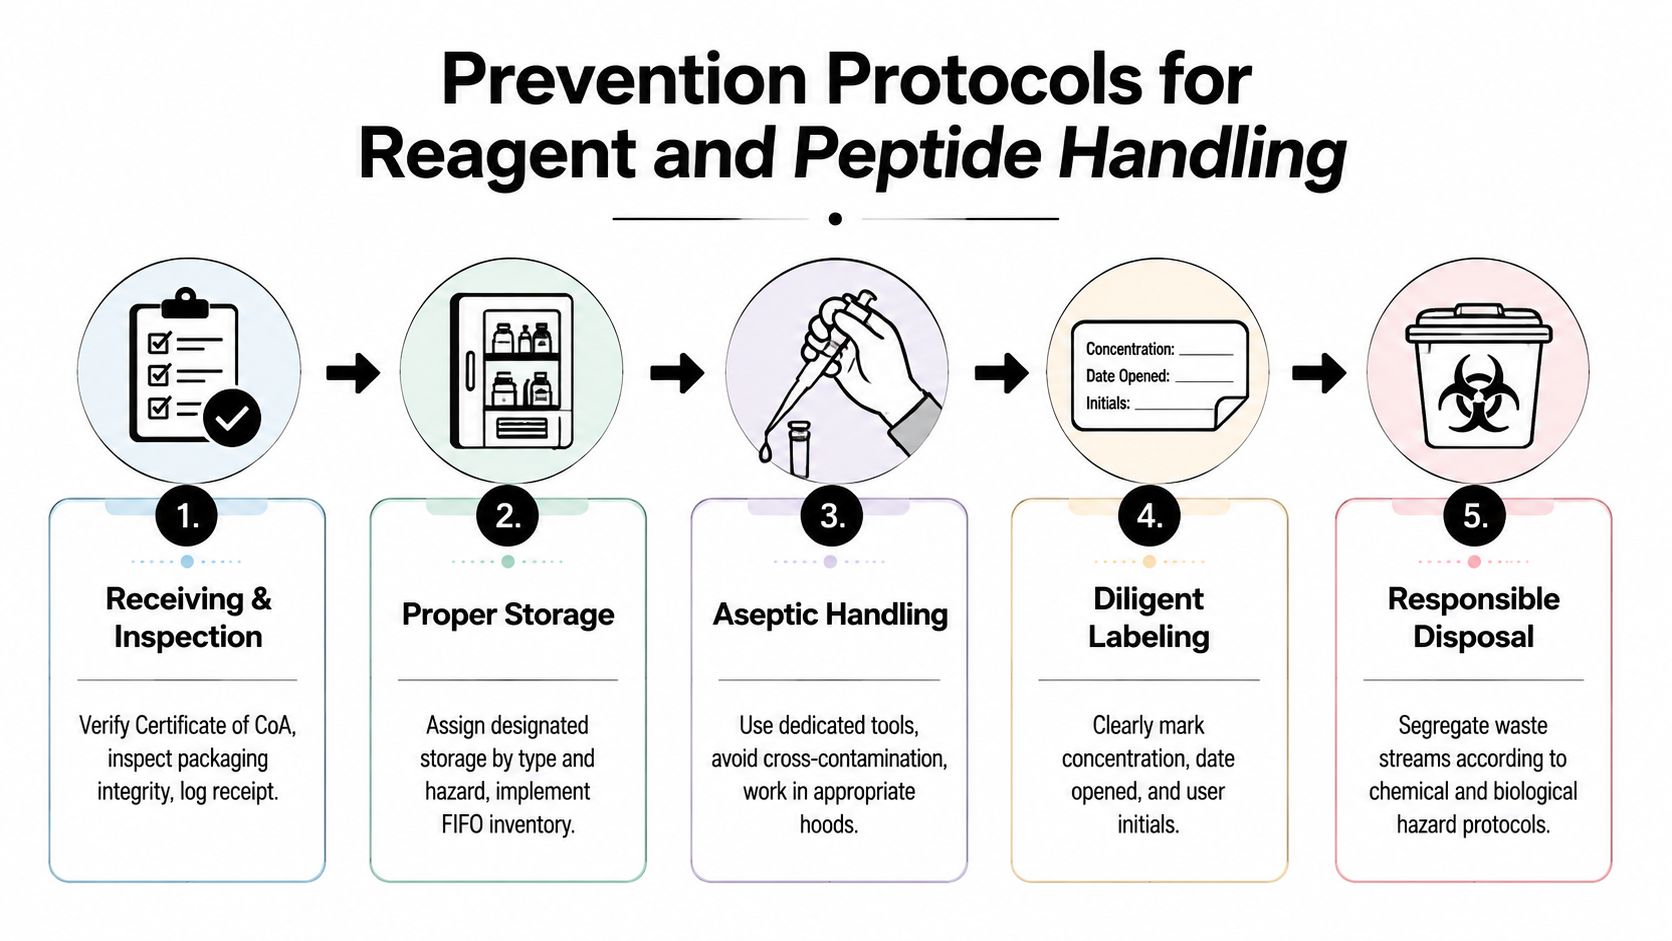
A contamination event often begins before a reagent reaches the bench. Receiving staff should match the container label to the Certificate of Analysis, verify sterility, endotoxin, and bioburden information where applicable, and inspect seals, closures, packaging, and cold-chain indicators. Damaged outer packaging or an unclear lot identity requires quarantine until someone resolves the discrepancy.
Storage should reflect compatibility, hazard, and intended use. Inventory records need the lot number, receipt date, storage location, expiration date, and any temperature excursion. First-in, first-out rotation limits avoidable aging. Marking each opened date also prevents a stock from staying in service indefinitely.
Aseptic handling at the bench
Before opening, wipe each bottle's exterior with 70% ethanol and let it dry. Verify biosafety cabinet airflow and certification status under the facility's approved procedure. Assign dedicated pipettes or transfer tools to materials that must not share contact paths, including bottle necks, caps, racks, and dispensing surfaces.
Unused material stays out of the original stock container. Returning it can carry contamination into the full batch, leaving later users unable to identify when exposure occurred. Touchpoint control matters as much as the disinfectant: hands, gloves, pipette shafts, bottle threads, and work-surface edges can reconnect a clean reagent with a contaminated surface.
Aliquoting and documentation
Single-use aliquots reduce repeated vial entry and limit freeze-thaw exposure. Follow the material's validated storage instructions rather than applying a generic peptide rule. Formulation, concentration, solvent, and intended application can all affect stability.
Label every aliquot with the material name, concentration, lot number, preparation date, expiration or review date, storage condition, and handler initials. Retain samples give investigators a comparison point during an event. Periodic testing of opened stocks can also identify deterioration before a study depends on them.
Wholesalers and distributors require the same controls at larger scale. They should verify cold-chain handling, monitor warehouse conditions, inspect bulk-container integrity, sanitize shipping containers, and preserve certificate traceability during repacking or relabeling. Herbilabs is one supplier option for laboratories seeking high-purity reagents and sterile diluents, with product documentation and research-use-only positioning described on its laboratory supplies site.
For peptide reconstitution, use a defined sequence: disinfect the septum, use a new sterile needle for each withdrawal, minimize exposure, and document every preparation. A peptide mixing guide can inform SOP development, while the laboratory's validated requirements control the final procedure.
Addressing Persistent Pathogens and Biofilm Risks
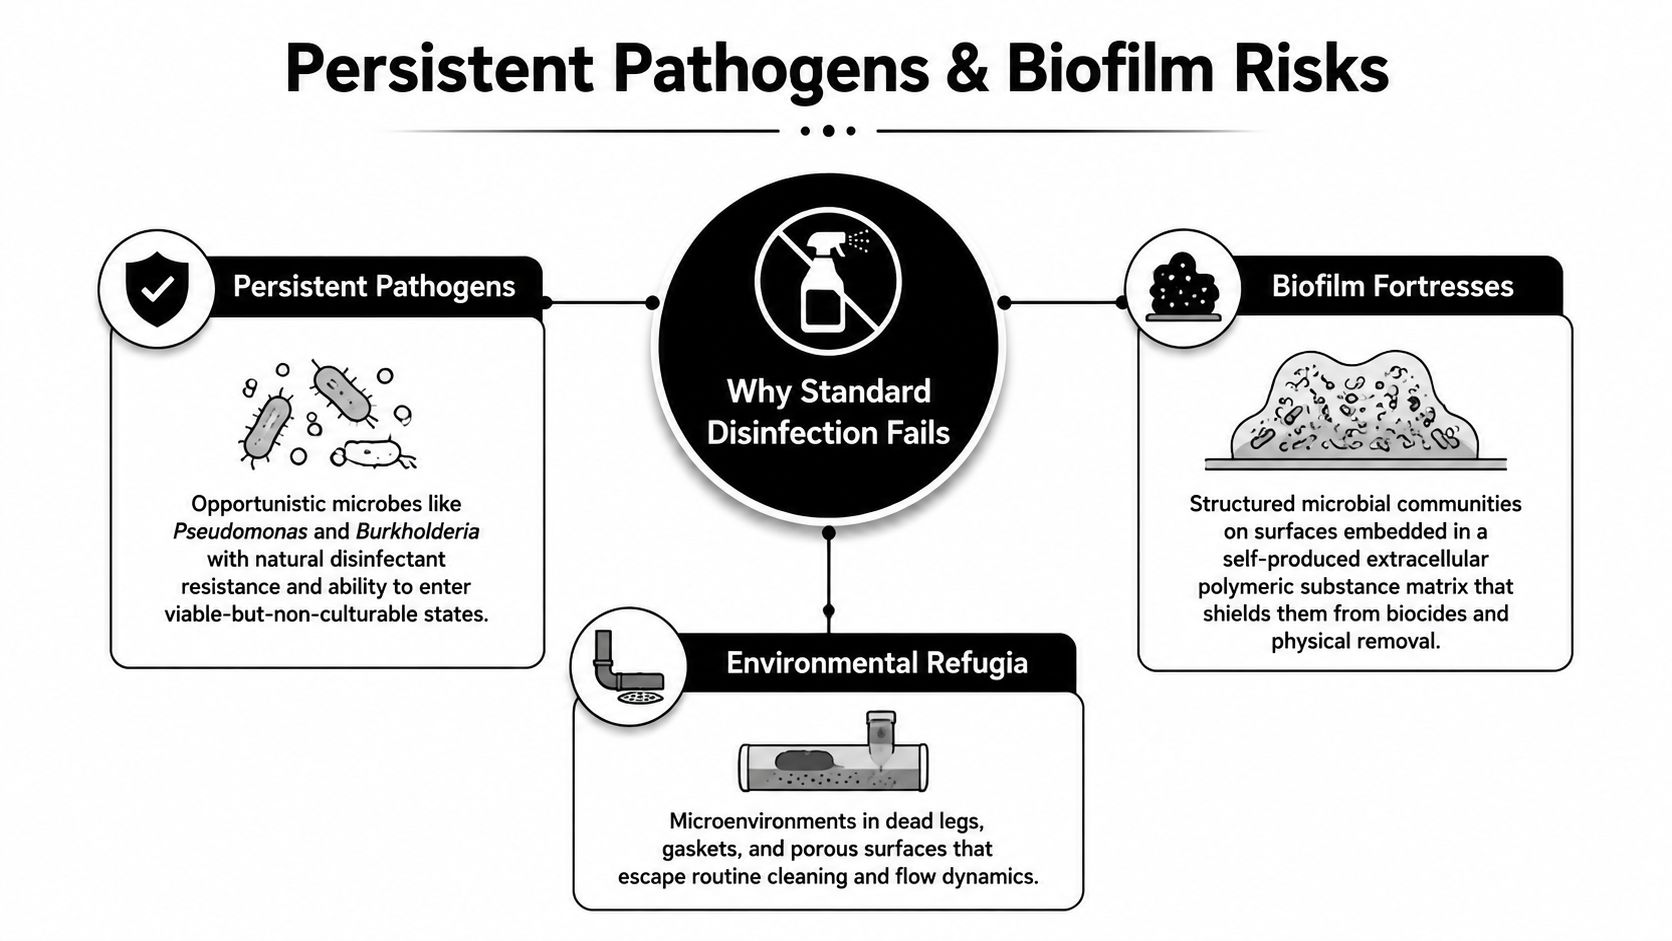
Routine disinfection fails when organisms are protected inside a biofilm. Pseudomonas, Burkholderia cepacia complex, and Ralstonia pickettii can survive in low-nutrient water environments. Once attached to a surface, cells produce an extracellular matrix that limits disinfectant contact and reduces the mechanical force reaching deeper layers.
Biofilm is an organized microbial community, not residue on equipment. Its matrix creates chemical and physical gradients, leaving inner regions exposed to less disinfectant and fewer nutrients. Changes in flow, vibration, or handling can then release planktonic cells into an output that appears clear.
Why a clean result can be misleading
A negative culture represents the sampled location and time, not necessarily the whole system. Protected cells may remain attached, stressed, or present at a concentration below the method's recovery limit. Culture conditions can also miss viable-but-non-culturable organisms. The result may therefore look acceptable while contamination later appears in cell culture, peptide assays, or endotoxin testing.
Use more than one detection approach when persistence is suspected. Confocal microscopy can show biofilm structure and its depth on a recovered coupon or removable component. ATP imaging can identify areas of biological activity, although ATP results require suitable controls and do not identify the organism. qPCR can detect target DNA, including organisms that are difficult to recover by culture. Because qPCR may also detect DNA from nonviable cells, pair it with culture, viability treatment, or other validated confirmation where the decision affects release.
Control principle: Treat biofilm assessment and removal as recurring maintenance, not a response reserved for a failed batch.
Designing a stronger response
Choose the intervention according to organism, equipment materials, validated facility procedures, and the limitations of the detection method. Compatible systems may use hydrogen peroxide or ozone treatment, planned disinfectant rotation, enzymatic cleaning, or point-of-use 0.2 µm filtration. These controls address different problems. Filtration can reduce downstream transfer, while chemical or mechanical treatment is needed to remove an established matrix.
Document disinfectant concentration, contact time, flushing, sampling locations, test methods, and return-to-service criteria. Do not improvise treatment in a live research or production system. A recurring detection should trigger trend review and confirmation sampling, not another isolated wipe-down.
Recent evidence reinforces the need to investigate persistence rather than rely on one safety result. A review of FDA enforcement reports identified Aspergillus penicilloides as the most commonly cited microorganism in sterile-product reports from 2019 through 2025, while Burkholderia cepacia complex led citations involving non-sterile products. The review also discussed contamination in hospital systems and dental unit water lines (review of persistent contamination evidence). These findings do not define every laboratory's risk, but they support organism-specific detection and follow-up.
Actionable Contamination Control Checklist
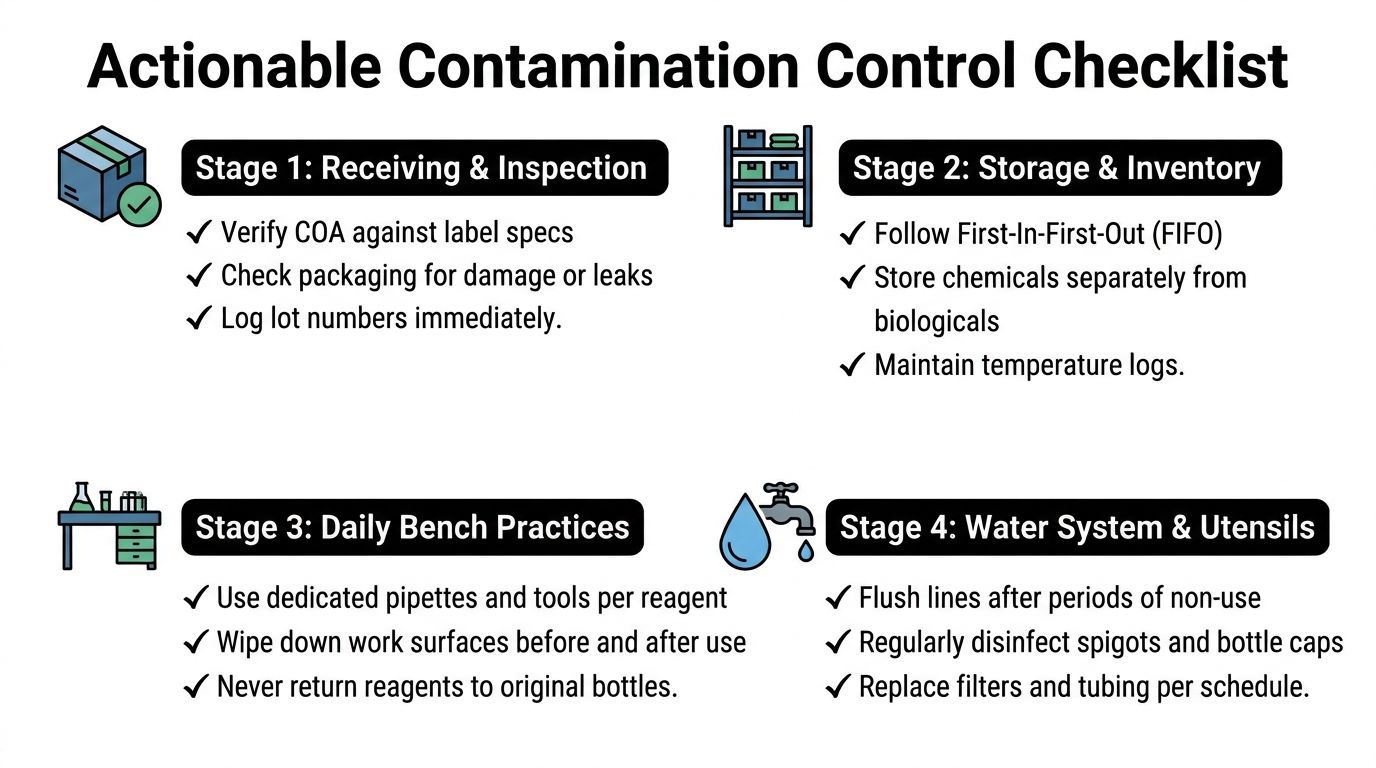
A checklist has value only when each item creates a record and assigns responsibility. Print the controls below, adapt them to the quality-management system, or convert them into sign-off sheets for each room, water loop, reagent class, and peptide workflow.
Receiving and inspection
- Match the paperwork: Compare the Certificate of Analysis, product label, lot number, and purchase record before release.
- Inspect the container: Quarantine packages with leaks, damaged seals, broken closures, unclear labels, or signs of temperature exposure.
- Record immediately: Enter receipt date, lot identity, storage condition, expiration date, and receiver initials in the inventory system.
- Retain evidence: Keep relevant packaging and certificates until the material passes incoming review.
Storage and inventory
- Assign locations: Separate biological materials, chemicals, and materials requiring special handling.
- Rotate stock: Apply first-in, first-out control. Remove expired or unreviewed containers from active use.
- Track movement: Record transfers between refrigerators, freezers, cabinets, and work areas.
- Review opened stocks: Mark opening dates and set a documented review or discard point for each material.
Daily bench practices
- Prepare the workspace: Clean and disinfect the cabinet, bench, pipettes, and tools before handling critical reagents.
- Control contact: Use dedicated tools, keep tips covered, disinfect bottle exteriors, and avoid touching closures or septa.
- Prevent backflow: Never return unused reagent to its original container.
- Close the record: Document handler initials, preparation date, aliquot identity, and abnormal observations.
Small touchpoints often defeat an otherwise sound workflow. Include bottle shoulders, cap interiors, pipette handles, rack surfaces, and frequently handled refrigerator controls in routine checks when they can contact hands, closures, or open materials.
Water systems and utensils
- Check condition: Inspect nozzles, caps, connectors, tubing, reservoirs, and utensils for residue, damage, or poor cleaning access.
- Monitor touchpoints: Add high-touch and liquid-contact components to the environmental monitoring plan, with named sampling locations and responsible staff.
- Follow approved schedules: Refer to the water-system protocols in the Prevention and Biofilm sections for flushing, disinfection, filter, and tubing schedules.
- Authorize return: Record maintenance status and confirm required post-intervention testing before critical use resumes.
Peptide user sub-checklist
- Disinfect the septum: Wipe the access surface with the approved alcohol disinfectant and allow it to dry.
- Use sterile access: Use a new sterile needle or validated sterile transfer device for every withdrawal.
- Aliquot deliberately: Prepare volumes that match planned use and reduce repeated entries.
- Limit exposure: Keep containers closed except during active preparation, then return them promptly to validated storage.
- Investigate changes: Quarantine solutions with cloudiness, particles, discoloration, odor change, or unexplained pH drift.
Wholesaler and distributor controls
- Check bulk integrity: Inspect drums, bottles, closures, and secondary packaging before dispatch or repacking.
- Preserve the cold chain: Document storage and transport conditions across each handoff.
- Verify certificates: Match certificate identity to the actual lot, not merely the product family.
- Sanitize shipping materials: Keep reusable containers and packing areas under a documented cleaning schedule.
A compliance score can track completed items, overdue actions, failed checks, and corrective-action closure. Review the sheet at a defined interval, identify repeated misses, and assign an owner and due date for every deviation. Include the record in contamination-event reviews, especially when reagent handling and water-system checks pass separately but failures cluster around shared touchpoints.
Herbilabs supplies high-purity reagents and sterile diluents, including bacteriostatic water, bac water, and reconstitution solutions in research-use-only glass vials, with COAs and wholesale or distribution options. The Herbilabs product and documentation pages may be reviewed when assessing reagent-handling and contamination-control requirements.


