Private Label, White Label, Wholesale partnerships available - EU, USA and UK - Free shipping from €75
How to Make Sterile Water: A Lab Guide for 2026
A researcher usually reaches this question at the worst possible moment. A buffer needs to be prepared, a peptide needs reconstitution, or a control run is waiting, and the nearest bottle of sterile diluent is empty. The temptation is obvious. Fill a bottle, boil some water, cool it, and move on.
That shortcut is where contamination problems start. In a lab, how to make sterile water isn't a kitchen task. It's a controlled process with a narrow margin for error, and the biggest mistakes usually happen after the heating or filtration step, when people assume the hard part is over.
Most failed in-house preparation doesn't fail because the operator forgot heat. It fails because the container wasn't suitable, the cap was handled badly, the transfer path wasn't sterile, or the team treated "sterile" as a property of the water alone instead of a property of the whole process. That distinction separates routine bench work from work that can stand up to quality review.
Table of Contents
- The Critical Difference Between Clean and Sterile Water
- Method 1 Autoclaving for Thermal Sterilization
- Method 2 Membrane Filtration for Aseptic Processing
- Comparing Sterilization Methods Which to Choose
- Validation Storage and Handling to Maintain Sterility
- When to Buy Commercial Sterile Water and Diluents
- Frequently Asked Questions About Sterile Water
The Critical Difference Between Clean and Sterile Water
A bottle of clear water can look perfect and still be unfit for research use. Clarity isn't sterility. Low conductivity isn't sterility. Distillation alone isn't always enough either, because the critical question isn't whether the water looks pure. The question is whether the process produced and maintained a microbiologically controlled product.
That distinction has been formalized for a long time. Sterile Water for Injection was standardized in the U.S. Pharmacopeia as a sterile, nonpyrogenic, solute-free preparation of distilled water for injection, which means it was defined as an injectable-grade material rather than "clean" water, as described in the USP background summarized here. The phrase nonpyrogenic matters because labs often focus on living contamination and overlook fever-causing contaminants and process residues that aren't addressed by casual handling.
What sterile actually means in practice
For bench work, a useful discipline is to separate three questions:
- Is the starting water suitable: Distilled or deionized feedwater reduces mineral and particulate burden, but it doesn't guarantee final sterility.
- Was a validated sterilization method used: Heat or filtration only works when the equipment, cycle, and setup are appropriate.
- Was sterility preserved afterward: Open caps, nonsterile funnels, reused bottles, and poor transfers undo the entire process.
A lot of confusion comes from consumer guidance crossing into lab language. Public health advice for sinus rinsing often treats distilled or sterile water as the first choice and allows boiled tap water under tightly defined household conditions. That's useful for home care. It is not a substitute for a lab protocol.
Practical rule: If a process can't define the water source, the sterilization step, the container, and the handling method, it can't support a sterile claim.
Labs that need to choose between packaged sterile products often also need to understand whether a preservative-containing option changes the use case. That distinction is explained clearly in this guide on bacteriostatic or sterile water for research use.
Why DIY logic breaks down fast
The common failure in DIY attempts isn't effort. It's uncontrolled variables. A researcher may boil water successfully, then pour it into a bottle that was rinsed but not sterilized, set the cap on the bench, and reintroduce contamination in seconds.
That's why procedural rigor isn't optional. In any serious setting, sterile water is never just water plus heat. It's water, vessel, closure, transfer path, and storage condition treated as one controlled system.
Method 1 Autoclaving for Thermal Sterilization
Autoclaving is the standard workhorse when the lab needs sterile water in a reliable, repeatable way and the application can tolerate heat.

Why autoclaving works
Steam sterilization works because saturated steam transfers heat efficiently into the liquid and the container surfaces. It isn't just "hotter than boiling." It combines temperature, pressure, exposure time, and steam contact in a way that destroys microbial life far more reliably than stovetop heating.
That difference becomes obvious when compared with pharmaceutical production. A patent describing Sterile Water for Injection production states that potable water is treated at at least 230°C (446°F) under pressure at least equal to saturated steam pressure, which shows how far validated industrial production sits above ordinary boiling, as described in this sterile water patent record. The takeaway isn't that every lab must match that exact process. The takeaway is that household boiling and laboratory sterilization are not equivalent categories.
A practical autoclave workflow
Use a repeatable setup every time. Variation is where water prep becomes unreliable.
Choose the right starting water
Distilled or deionized water is the normal starting point. If the source water carries visible particulates or dissolved residues, sterilization won't remove them.Use proper containers
Borosilicate media bottles or Schott-type bottles are standard because they tolerate thermal stress better than ordinary glass. Caps should be loosened or vented before the cycle so pressure can equilibrate safely.Fill with headspace
Don't fill to the brim. Water expands with heat, and steam circulation around the closure matters. Overfilled bottles are harder to sterilize properly and more likely to leak.Load the autoclave correctly
Bottles should stand upright and not be packed tightly together. Steam has to contact the load evenly.
Where teams lose sterility after the cycle
Autoclaving creates a false sense of security because the cycle feels definitive. It isn't. The cycle only proves that the load was exposed to the programmed conditions. It doesn't protect the bottle after the chamber opens.
A sterile load can become nonsterile during the first careless touch.
That is why labs use process checks, not assumptions. Chemical indicators such as autoclave tape help confirm exposure, and biological indicators are used in more formal verification workflows to test whether the sterilization process performed as intended.
A short demonstration helps less experienced staff understand why load arrangement and vessel choice matter:
Failure points to watch
- Caps tightened before the run: This can create pressure problems and poor steam penetration.
- Wrong bottle material: Cheap plastic or low-grade glass may deform, crack, or compromise the seal.
- Hot bottles opened too early: Cooling water can draw in contamination if the closure is disturbed.
- No labeling: If nobody knows the preparation date or intended use, the bottle becomes guesswork.
Autoclaving is the right answer for routine sterile water preparation when thermal exposure isn't a problem and the lab can control the entire cycle through storage.
Method 2 Membrane Filtration for Aseptic Processing
Filtration is the method to choose when heat would damage the material being prepared with the water, or when the workflow is already built around aseptic transfer rather than terminal steam sterilization.

When filtration is the right choice
Membrane filtration doesn't kill contaminants with heat. It removes them from the fluid path by size exclusion through a sterile filter assembly. In practice, labs use it for heat-labile solutions, sensitive reagents, or workflows where the final container must remain closed after aseptic filling.
This approach is common when the water is only one part of a larger sterile solution. If a protein, peptide, or unstable additive can't tolerate autoclaving, the process has to shift from thermal destruction to aseptic control.
The sterile fluid path matters more than the filter alone
New researchers often focus on the membrane pore size and ignore everything around it. That's backwards. A sterile filter only works if the entire path stays sterile from source vessel to receiving container.
That means:
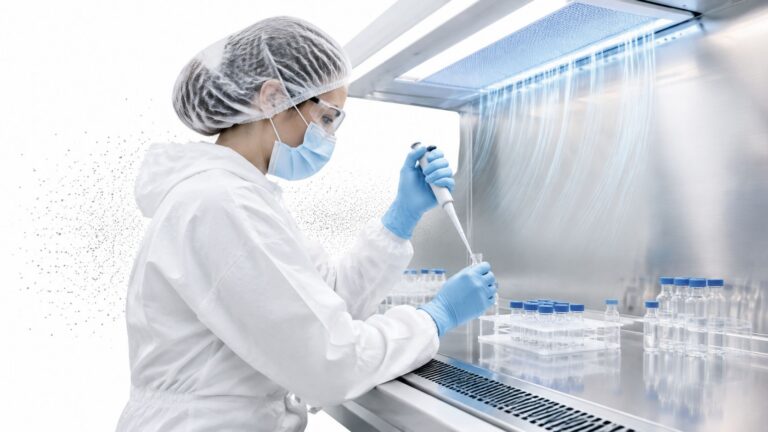
- A clean working zone: A laminar flow hood or similarly controlled environment is the right setting.
- Sterile components: Syringes, filter units, tubing, and collection bottles should be sterile before contact.
- Disciplined glove use: Gloves aren't sterile because they're gloves. They need proper handling and surface control.
- Minimal interruptions: Every pause, cap removal, and bench contact creates another contamination opportunity.
Filtration is less forgiving than autoclaving. The process succeeds or fails on technique.
Aseptic filtration workflow
A good membrane filtration run is quiet and deliberate.
First, stage everything before opening any sterile packaging. Place the receiving bottle, filter unit, source water, and closures so the operator doesn't have to reach across the workspace or hunt for parts mid-process.
Next, connect the sterile path with as few manipulations as possible. For small volumes, a presterilized syringe filter and sterile collection vial are usually enough. For larger volumes, a sterile vacuum filtration unit makes more sense because it reduces repeated handling.
Then transfer the water smoothly. If resistance rises sharply, stop and assess the setup rather than forcing flow. Excess pressure can compromise connections or create splashing at the outlet, which defeats the point of aseptic filling.
What usually goes wrong
The classic filtration errors aren't dramatic. They're ordinary.
- Touching the sterile outlet: One fingertip contact can invalidate the batch.
- Using a nonsterile receiving bottle: The filter can't protect what happens after discharge.
- Working outside controlled airflow: The open path is then exposed to room contamination.
- Recapping carelessly: Closures picked up from the bench are a common source of recontamination.
Filtration is excellent when the lab needs sterile water without heat exposure. It is not easier than autoclaving. It rather moves the control burden from thermal parameters to operator technique and sterile handling.
Comparing Sterilization Methods Which to Choose
Most labs don't need a philosophical answer. They need a defensible one. The right method depends on what the water will contact, how the lab is equipped, and whether the operator can maintain a controlled process after sterilization.

Selection guide at a glance
| Criterion | Autoclaving (Thermal Sterilization) | Membrane Filtration (Aseptic Processing) |
|---|---|---|
| Core mechanism | Steam, heat, and pressure | Physical removal through sterile membrane |
| Best fit | Plain water, buffers, heat-stable liquids, labware | Heat-sensitive solutions and aseptic fills |
| Main operational risk | Poor cycle setup or bad post-cycle handling | Breaks in sterile technique during transfer |
| Container demands | Heat-tolerant vessels and suitable closures | Sterile receiving container and protected fluid path |
| Workflow strength | Strong for repeatable batch prep | Strong for delicate or mixed formulations |
| Typical bottleneck | Cooling and safe handling after sterilization | Operator skill and environment control |
| What it doesn't solve by itself | End-to-end sterility after opening | Contamination introduced downstream of the filter |
How the decision usually plays out in practice
If the lab is preparing plain water for routine bench use, autoclaving is usually the simpler and more durable choice. It handles volume better, fits standard media-bottle workflows, and doesn't rely on maintaining an open aseptic transfer for long periods.
If the liquid contains anything heat-sensitive, filtration becomes the practical route. Enzymes, peptides, and fragile biological components don't tolerate "just autoclave it" thinking. In those cases, the sterile path matters more than the speed of the cycle.
A useful decision test is whether the lab can control the weakest part of each process:
- Choose autoclaving when the lab can run a validated steam cycle and keep bottles sealed afterward.
- Choose filtration when the lab has a proper aseptic workspace and staff who can maintain a sterile transfer path.
- Choose commercial sterile water when neither process can be controlled reliably enough for the application.
Many quality problems become management problems, not technical ones. The wrong choice often comes from trying to force the available equipment onto the application instead of matching the method to the risk.
Validation Storage and Handling to Maintain Sterility
A sterile batch is only useful if it stays sterile until the moment of use. That sounds obvious, but most avoidable failures happen after preparation, when the water leaves the sterilizer or the filter assembly and enters ordinary lab traffic.
Sterility is lost in ordinary handling
Household guidance offers a useful warning here. Cleveland Clinic states that tap water should never be used straight from the tap for nasal irrigation because low levels of germs can still cause serious infections, and boiled water stored in a clean, sealed container has a usable window of only 24 hours, according to its saline solution preparation guidance. The laboratory lesson is straightforward. Even when water has been heat-treated, post-sterilization handling and storage control risk.
The same pattern appears in labs every day. Someone loosens a cap to "let it breathe." A bottle is poured into smaller containers with a nonsterile funnel. A worker uses the same opened bottle across multiple sessions. None of those steps looks dramatic. Together, they erase the value of the original sterilization step.
What validation should actually check
Validation doesn't need to be theatrical, but it does need to be intentional. A practical in-house approach is to verify both process and outcome.
Consider a layered check:
- Process evidence: Confirm that the autoclave cycle or filtration setup ran as intended.
- Container integrity: Inspect vessel, cap, liner, and seal condition before release.
- Outcome monitoring: Plate a small aliquot on suitable growth media when the application justifies microbiological confirmation.
- Traceability: Record date, operator, batch purpose, and storage location.
Release rule: If the lab can't show how the water was prepared and protected, the batch shouldn't be treated as sterile.
Storage rules that prevent avoidable failures
The simplest storage practice is usually the best one. Keep the product in the same sterile, tightly closed container used immediately after preparation, and don't decant unless the receiving container is also sterile and the transfer is controlled.
A workable storage discipline includes:
- Clear labeling: Write the preparation date, lot or batch identifier, and intended use.
- Defined access: Limit who can open the bottle and under what conditions.
- Minimal reuse: Single-purpose containers reduce repeated contamination events.
- Routine disposal: If handling history is uncertain, discard the batch.
Labs that need a stronger handling culture usually benefit from basic refresher training in essential aseptic techniques for accurate lab research. The issue is rarely knowledge of microbiology. It's inconsistent bench behavior under time pressure.
The core point is simple. Sterility is not a moment achieved at cycle completion. It's a condition maintained by disciplined storage, limited access, and controlled use.
When to Buy Commercial Sterile Water and Diluents
There is a point where making sterile water in-house stops being efficient and starts introducing unnecessary risk. That point comes sooner than many teams expect.
The point where in-house prep stops making sense
Home and consumer health guidance already shows how fragile improvised sterile preparation can be. AboutKidsHealth advises boiling 1 L of tap water for 15 minutes for saline preparation, refrigerating it, and using it within 24 hours, while a distilled-water method can be stored for 1 month when 4 L of distilled water is mixed with 8 teaspoons of salt. The same guidance notes CDC advice to use store-bought water labeled distilled or sterile, or boil tap water for 1 minute before cooling, because unsafe water can expose users to rare but severe infections such as those caused by Naegleria fowleri, as summarized in this home saline preparation reference. If even low-complexity consumer use needs strict preparation and short holding times, research workflows with expensive materials should be even less tolerant of uncertainty.

Applications where buying is the safer call
Commercial sterile water and diluents are the better choice when the cost of a failed batch is higher than the cost of the product. That includes:
- Critical reconstitution work: When the material is expensive, unstable, or difficult to replace.
- Cell and tissue workflows: Where contamination can invalidate a full run.
- Labs without validated equipment: If the facility lacks dependable autoclave performance or a proper aseptic setup.
- Teams that need consistency across sites: Purchased, lot-traceable material reduces operator-dependent variation.
It also makes sense when procurement is easier to standardize than bench preparation. A buying decision can remove a recurring source of process drift.
For labs that need a ready-made option, Sterile Water for Injection and related diluents are often the more defensible route than trying to reproduce commercial control with improvised in-house methods.
Frequently Asked Questions About Sterile Water
Is distilled water the same as sterile water
No. Distilled water refers to a purification method. Sterile water refers to a microbiological state maintained through a controlled process and suitable handling. Water can be distilled and still become contaminated later if the container or transfer path isn't sterile.
For higher-grade applications, the distinction goes further. Some regulated products are also expected to meet nonpyrogenic requirements, which is a different claim from simple microbial absence.
Can boiling make lab-grade sterile water
Boiling can reduce risk for limited household uses, but it doesn't equal validated laboratory or pharmaceutical preparation. Consumer guidance is inconsistent because the use case is different. One source aimed at non-medical users notes that recommendations vary from 3 to 5 minutes of boiling to 15 to 20 minutes, and another specifies 121°C for 20 minutes in a pressure cooker, which is closer to autoclave conditions than ordinary boiling, as described in this overview of sterile water methods for non-medical users.
That inconsistency is the problem. If the method depends on loosely interpreted household steps, it isn't a substitute for validated lab practice.
For research work, "boiled" and "sterile" shouldn't be treated as interchangeable terms.
Can a microwave or household pressure cooker replace lab equipment
A microwave isn't a laboratory sterilization device. Heating may be uneven, container suitability may be poor, and the process isn't validated for sterile preparation.
A household pressure cooker can move closer to autoclave-like conditions than open boiling, but that still doesn't make it a lab-standard solution by default. The missing pieces are process validation, suitable vessels, sterile handling, and controlled release criteria. Equipment alone doesn't create a compliant workflow.
How long does homemade sterile water stay usable
There isn't one universal answer, because the primary limitation is handling and storage control. Once the container is opened or transferred, risk rises sharply. Conservative practice is to use small volumes, keep containers sealed, label them clearly, and discard them if the history is uncertain.
That is why labs preparing their own sterile water should set internal use windows based on container type, handling frequency, and application criticality rather than relying on casual assumptions.
Herbilabs supplies high-purity sterile diluents and research-use labware for teams that don't want water preparation to become a source of contamination, inconsistency, or wasted material. Researchers, resellers, and distribution partners can explore the full catalog at Herbilabs.