Private Label, White Label, Wholesale partnerships available - EU, USA and UK - Free shipping from €75

Glass Vial Labels: A Practical Guide for Research Labs
At 7 a.m., a researcher pulls a small glass vial from an ultra-low freezer. Frost covers the surface, the ink has faded, and the label no longer makes it obvious whether the vial contains a research-grade compound or a regulated substance. The experiment is waiting, but the identity needs confirmation before the vial can safely reach the bench.
That situation captures the job of glass vial labels. A label has to identify material, support traceability, remain readable after storage and handling, and fit within a very small curved area. It also has to work alongside the vial, closure, carton, safety data sheet, and site procedures. A design that looks excellent on a flat screen can fail after freezing, condensation, sterilization, or solvent wiping.
Table of Contents
- Why Glass Vial Labels Matter More Than Researchers Realize
- A Short History of Labeling Small Glass Containers
- Regulatory Requirements Across EU, UK, and US
- Choosing Materials and Adhesives for Lab Conditions
- Designing the Layout for Small Curved Surfaces
- Printing Methods Compared for Research-Scale Runs
- Templates for 2 mL, 10 mL, Cryo, and Multi-Vial Kits
- Common Mistakes, Checklist, and FAQs for Vial Labels
Why Glass Vial Labels Matter More Than Researchers Realize
A small vial creates a difficult compromise. The available surface must carry a readable product identifier, lot or batch information, storage instructions, human-readable fallback text, and possibly hazard communication or a machine-readable code. Adding every possible phrase can leave the label too crowded to scan or read, while removing critical information can make the container unsafe to handle.
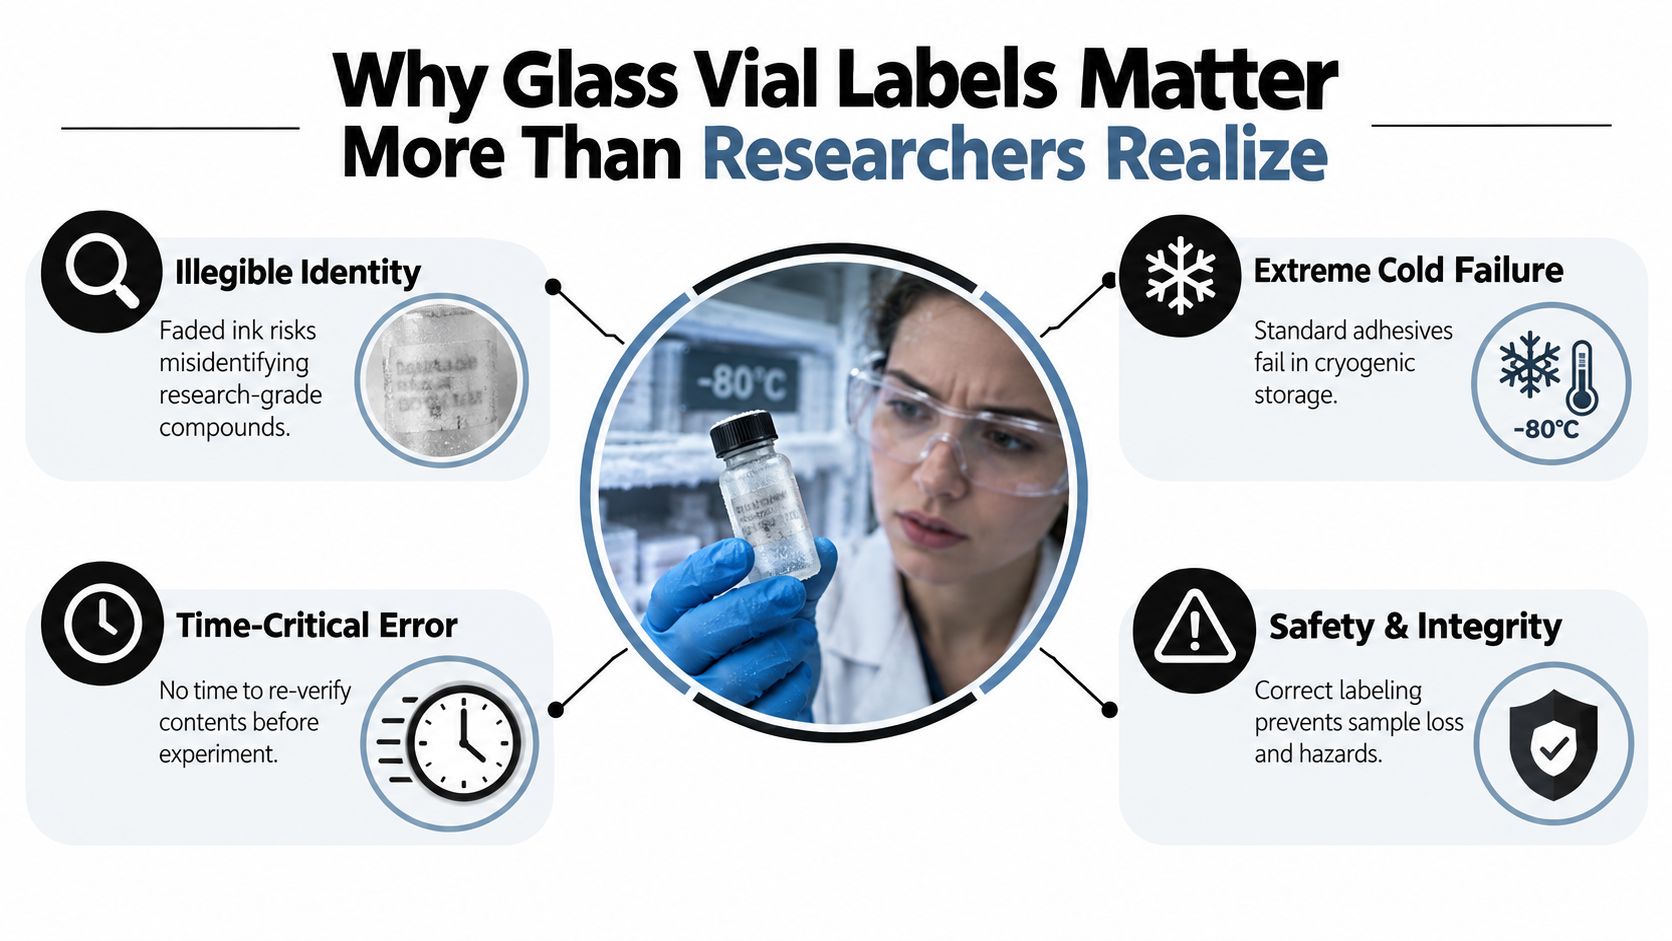
The label also has to survive the vial's actual lifecycle. A standard office label may look acceptable at room temperature, then lift at the edges in a freezer, wrinkle as condensation forms, or smear during an alcohol wipe. Once the identity becomes uncertain, the problem isn't cosmetic. The sample may need quarantine, the experiment may require a deviation record, and a misidentified chemical can create a handling or chemical hygiene incident.
Practical rule: The label specification starts with the storage and handling conditions, not with the artwork.
Traceability makes the same point from another direction. A compact code can connect the physical vial to a sample record, certificate, inventory entry, or recall workflow, but only if the print remains legible and the code scans on the curved glass. Teams that already manage lot number traceability should treat the vial label as the physical key linking the bench item to that record.
The safest approach is to treat the label as a compliance artifact, not a sticker. For small formats, a concise immediate label paired with compliant outer packaging or an enclosure card often works better than forcing every statement onto the glass.
A Short History of Labeling Small Glass Containers
Small-container labeling began as a practical memory aid. Historical evidence describes a medicine chest from 1562 to 1566 containing 126 glass vessels, each with an individual handwritten paper label attached to a metal lid. In the 17th century, pharmacists also tied the original prescription order to the neck of the phial holding the medicine, a neck-tag practice that continued into the late 18th and early 19th centuries for small patient-dispensed vials, as documented in this history of early medicine-container labels.
Those early methods solved identification, but they exposed the weaknesses of paper, string, handwriting, and handling. Tags could detach, writing could become illegible, and the label wasn't always available at the point where the vial was stored. The move toward permanent identification addressed those failures rather than improving appearance.
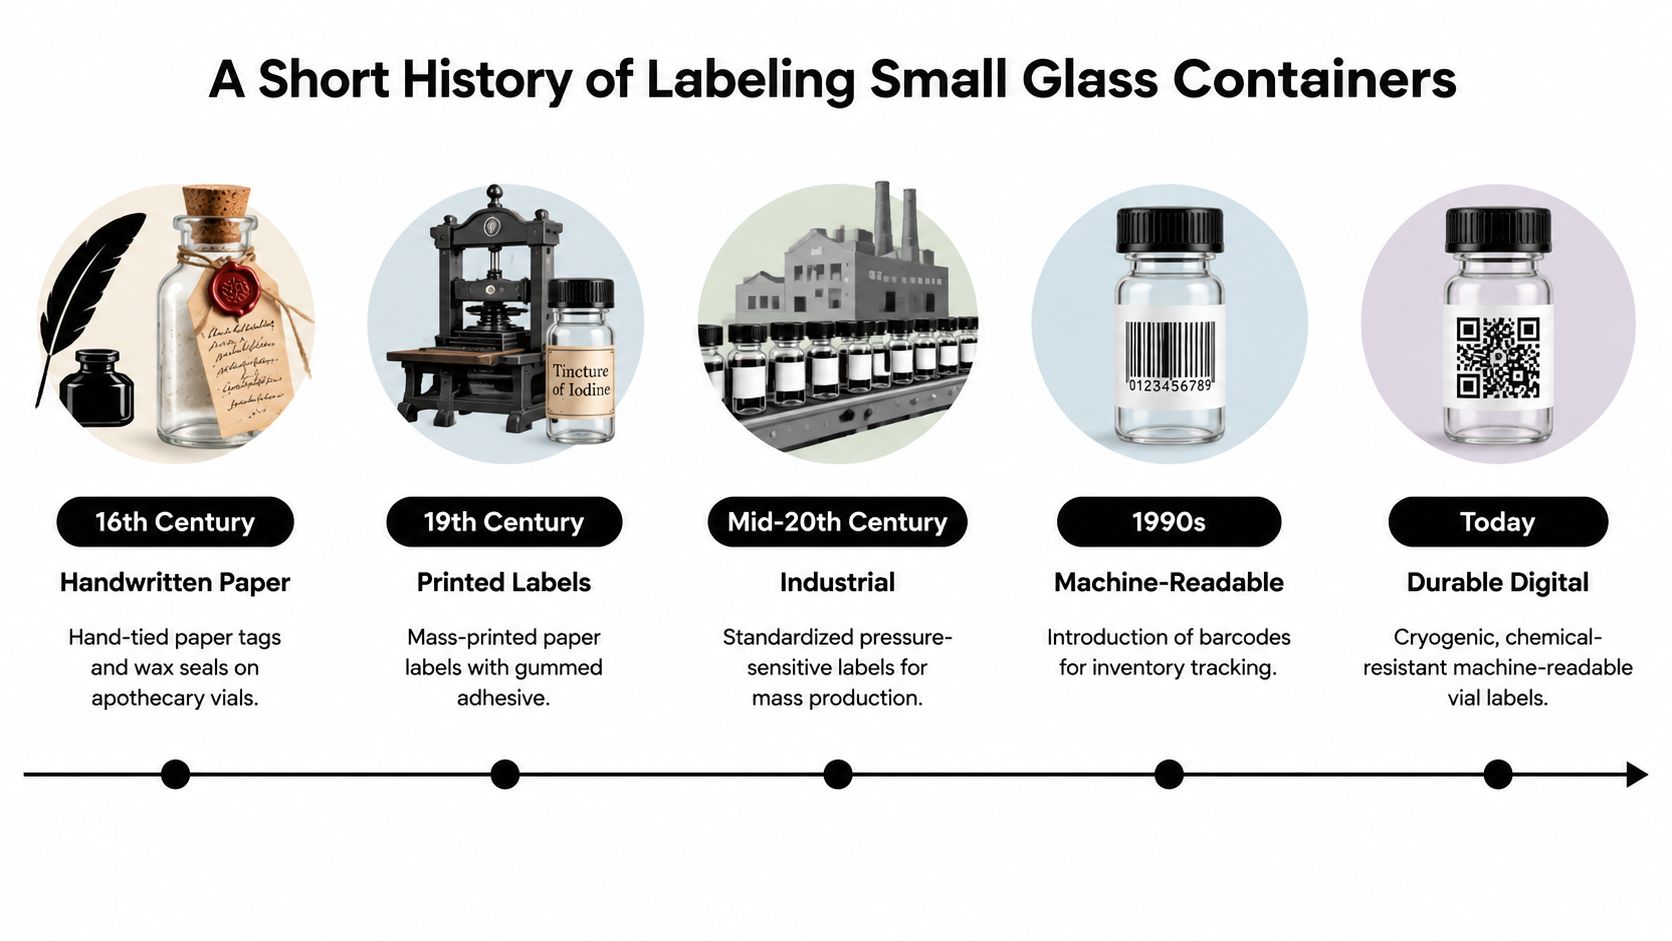
By the late 1700s, apothecaries and makers increasingly used labels under glass or identification molded into the container. These methods reduced the risk of loss, damage, and illegibility. During the 1800s, improved printing helped produce more colorful and standardized labels on glass bottles, as described in this account of durable glass-bottle labeling practices.
Modern laboratory labels continue the same progression. Printed adhesive media replaced many manual systems, synthetic face stocks improved resistance to moisture and handling, and machine-readable codes reduced reliance on transcription. Cryogenic materials address freezer exposure, while variable-data printing connects each vial to a defined record.
The lesson is straightforward. Durable substrates, validated adhesives, and digital identifiers are not separate trends. They are successive answers to the same operational problems: identity loss, environmental damage, manual error, and weak audit trails. Today's label is more compact, but its purpose remains familiar.
Regulatory Requirements Across EU, UK, and US
A 2 mL vial leaves a laboratory with one label, then enters a kit, carton, or shipment governed by another jurisdiction. The label is therefore a compliance artifact, not merely a sticker. EU CLP, UK GB CLP, US OSHA Hazard Communication requirements, and FDA drug-product controls apply according to the substance, product type, intended use, packaging, and destination.
Start by identifying what must remain available at the point of use:
- Product identity: Can a handler identify the substance or mixture without opening a database?
- Supplier identity: Can the responsible supplier be traced?
- Hazard communication: Are the required pictograms, signal word, hazard statements, and precautionary statements presented in the applicable format?
- Traceability fields: Where relevant, do lot, expiry, or batch fields connect to the controlled record?
- Small-container strategy: Can the required content stay readable on the vial, or should compliant outer packaging carry part of it?
The same kit may need separate review for the EU and UK. Their systems are closely related, but EU CLP and UK GB CLP are not interchangeable. EU CLP updates introduce phased obligations through the end of the decade, including changes affecting small-container labeling and label updates, as outlined in this overview of EU CLP labeling requirements. The applicable destination, classification, and packaging format determine which details belong on the immediate container.
| Element | EU CLP | UK GB CLP | US OSHA HCS 2024 | FDA 21 CFR |
|---|---|---|---|---|
| Product identifier | Required where the CLP classification applies | Required under the GB framework | Required for covered hazardous chemicals | Drug-product identity and labeling controls apply according to product type |
| Supplier information | Required in the applicable label system | Required in the applicable GB system | Supplier identification is part of hazard communication | Responsible-party and product information are controlled through drug labeling requirements |
| Hazard pictograms | Used for applicable classified hazards | Used for applicable classified hazards | Used for applicable hazards | Not the primary organizing system for drug-product labels |
| Signal word and statements | Hazard and precautionary statements may be required | Equivalent GB requirements may apply | Signal word, hazard statements, and precautionary statements apply where required | Focus includes product identity, strength, handling, and traceability rather than a universal GHS label |
| Lot and expiry | May support product control where applicable | May support product control where applicable | Usually managed through product and workplace systems | Important for drug-product traceability and control |
| Outer packaging or enclosure | May carry permitted information for small containers | May carry permitted information for small containers | Can support workplace communication when the immediate container is limited | Packaging hierarchy and approved labeling must be documented |
For drug products, FDA vial labeling and container-closure changes are formal compliance matters. Use the FDA guidance on glass vials and stoppers for drug products, rather than a historical glass-bottle article, when reviewing this type of change. The applicable drug-labeling requirements still depend on the product and its regulatory pathway.
The practical decision belongs in the packaging record. If all required text cannot fit at a readable size, reducing the vial label to permitted identity and traceability information, then placing the remaining controlled information on a carton, enclosure card, or SDS-linked system, may reduce risk. Tiny type can satisfy a visual checklist while failing at the bench.
Teams establishing that hierarchy can use these packaging requirements for laboratory products as a starting point, then confirm the product classification, destination, and approved label content with the responsible regulatory function. The final layout should show which information travels with the vial and which information travels with its outer package.
Choosing Materials and Adhesives for Lab Conditions
The face stock, adhesive, ink, and topcoat work as one system. Changing only the paper or only the printer can produce a label that fails because the adhesive cracks, the ink dissolves, or the surface becomes unreadable.
Cryogenic storage is the clearest example. Labels intended for deep-freeze or cryogenic use need bonding that remains intact through repeated freeze-thaw exposure. Laboratory cryogenic products specify adhesion to both glass and polypropylene, with construction intended to resist cracking and edge lift under thermal stress, as described in this cryogenic label format guide.
| Storage condition | Face stock | Adhesive type | Finish or topcoat | Failure mode to avoid |
|---|---|---|---|---|
| Ultra-low freezer | Polyester or another validated synthetic | Cryogenic acrylic | Protective laminate where wiping occurs | Edge lift after condensation and refreezing |
| Deep cryogenic storage | Cryogenic synthetic media | Adhesive rated for the actual exposure | Cold-resistant print protection | Cracking, shrinkage, or loss of bond |
| Autoclave exposure | Printable polyester or polypropylene | High-temperature acrylic | Heat and moisture-resistant overprint protection | Ink bleeding, distortion, or adhesive failure |
| Solvent wiping | Synthetic face stock | Chemical-resistant adhesive | Protective topcoat or laminate | Smearing, dissolution, and barcode loss |
| Room-temperature storage | Paper or synthetic stock, depending on handling | General laboratory adhesive | Optional protective coating | Premature wear from routine handling |
Paper remains suitable for some dry, room-temperature workflows, but it is a poor default for freezer use. Solvents such as ethanol, isopropanol, DMSO, acetonitrile, and acetone can attack unprotected print surfaces, so a lab should test the complete printed label rather than relying on the substrate name alone.
Autoclave workflows need special validation. Heat, steam, pressure, and repeated handling can damage ordinary media even when the glass vial itself tolerates the cycle. A thermal-transfer polyester label with a compatible resin ribbon and heat-resistant adhesive is a more defensible starting point than an uncoated paper label.
Amber glass adds another design question. An opaque white label can improve contrast, while a clear-overlaminate approach may preserve more of the vial's appearance. Either choice should be checked against light protection, barcode contrast, and the need to inspect the contents.
Bench rule: A label approved for a freezer isn't automatically approved for liquid nitrogen, autoclaving, or solvent wiping.
A supplier of sterile glass vials can help define the vial and closure format, but the laboratory still needs a documented label challenge test. Apply the printed label to the actual vial, expose it to the harshest expected condition, and inspect adhesion, legibility, code readability, and residue.
Designing the Layout for Small Curved Surfaces
A cylindrical vial isn't a miniature flat carton. The usable label area comes from the straight-sided body, not the full height of the glass. Edges that reach the shoulder or base encounter stronger peel forces because curvature concentrates stress, which is why industrial vial-labeling systems target tight placement tolerances and report approximately ±0.5 mm for height and centering and ±1° for rotation across 2 mL to 100 mL vial formats, according to this vial-label placement reference.
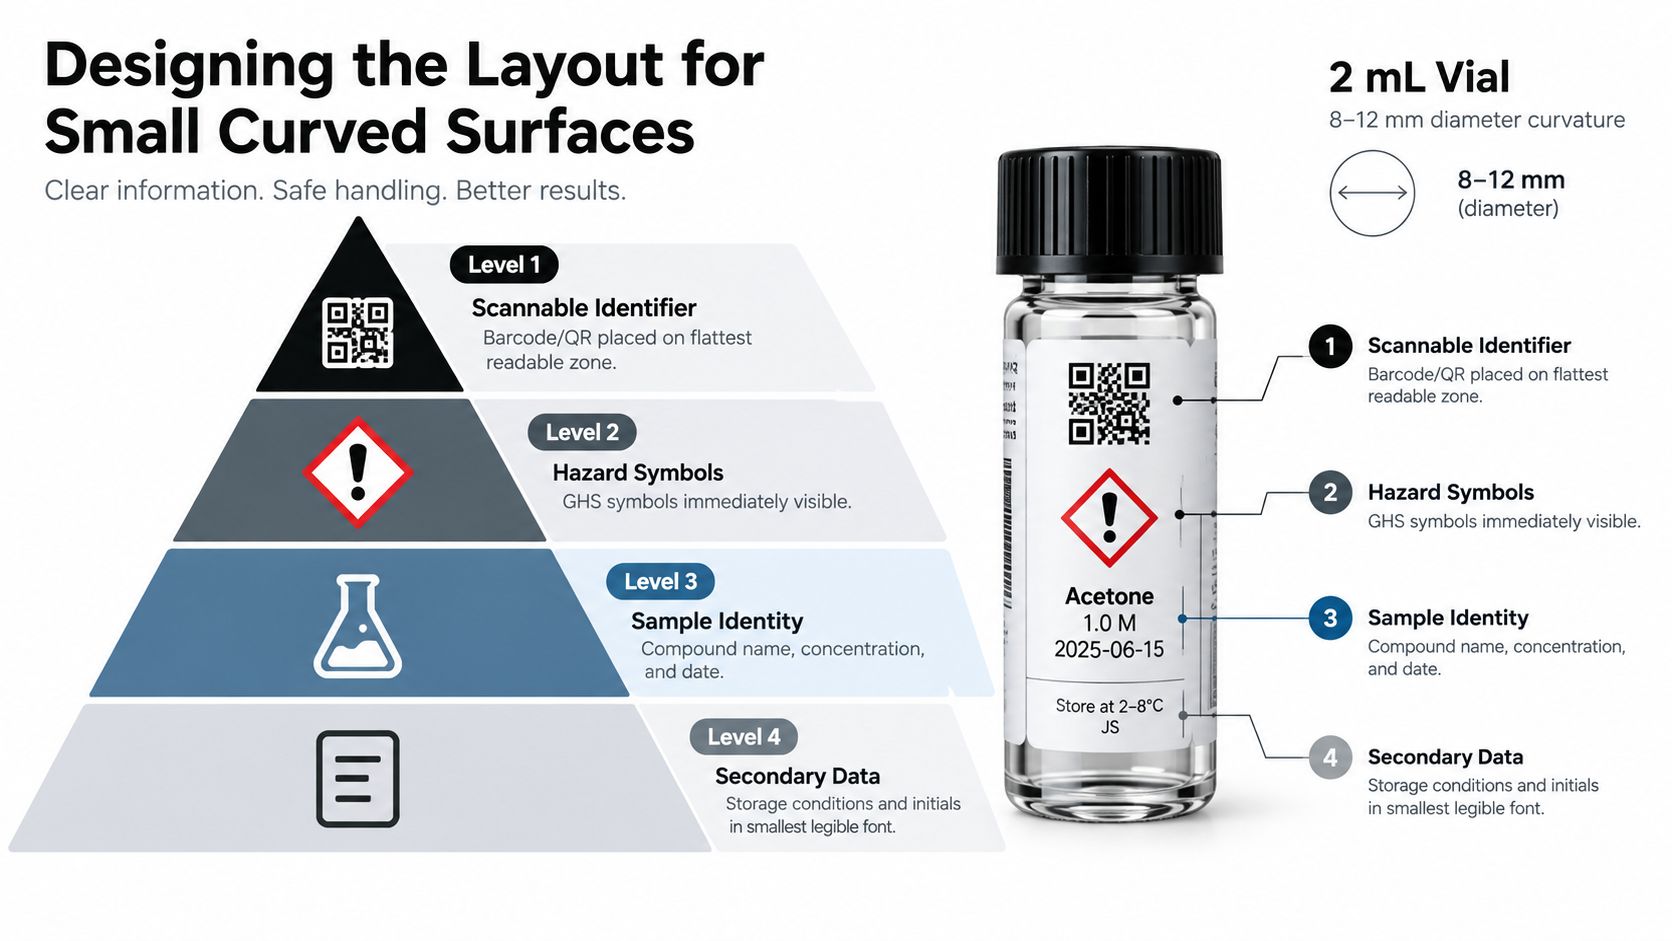
A useful hierarchy places the information that prevents a handling error first:
- Scannable identifier: Put the Data Matrix or QR code on the flattest practical zone. Keep the code parallel to the vial axis where possible, with its quiet zone intact.
- Hazard communication: Keep applicable pictograms and the signal word visible, separated, and clear of the crimp seal.
- Sample identity: Give the compound name, concentration, lot, and relevant date fields enough contrast for quick human reading.
- Secondary information: Put storage conditions, initials, and supporting instructions in the remaining legible space.
Variable data should use a sans-serif typeface at a readable size, with fixed text larger where the workflow allows. Critical text should remain horizontal. Wrapping secondary information may save area, but wrapped product identity or hazard wording slows recognition at the bench.
Set deliberate margins around codes and text. Thin rules, dense graphics, and low-contrast colors can disappear after printing or frost exposure. Hazard colors should communicate hazard, while informational elements should avoid competing with the identifier.
Wrap-around labels offer more information capacity and mechanical retention, but they can place codes across a changing curve. Flag labels create a flatter printable face and may help with handwriting, though the projecting edge can catch on racks or adjacent vials. For teams refining the visual finish of glass packaging, this guide to a flawless sticker finish on glass provides useful production context.
A short visual demonstration can help operators understand how curved placement affects alignment.
The final proof should be printed on the intended stock and applied to the vial. A flat PDF proof can't reveal shoulder lift, code distortion, or rack interference.
Printing Methods Compared for Research-Scale Runs
Research labs often print mixed batches rather than one uninterrupted production run. That makes variable data, quick changeovers, and media durability more important than showroom color alone.
Thermal transfer is usually the practical choice for durable variable-data work. A resin ribbon paired with polyester can produce smudge-resistant text and codes, but the printer, ribbon, and label stock must be matched. Incorrect ribbon chemistry can leave weak print even when the adhesive performs well.
Laser printing suits low-volume work on synthetic sheets. It avoids dedicated ribbon management, but sheet edges and toner adhesion need testing when labels face cold storage, condensation, or solvent wiping. It can be convenient for occasional batches, not automatically reliable for severe conditions.
Inkjet handles flexible color output and short custom runs. For laboratory use, pigment-based ink and a printer designed for synthetic media are more defensible than ordinary dye ink. The printed surface still needs a wipe and storage challenge.
Pre-printed stock works when only a small field needs completion by hand. It can support an emergency or very low-volume workflow, but handwriting introduces consistency and traceability concerns. A human-readable field and a controlled log can reduce that risk, but the process needs approval.
| Print method | Durability | Best run size | Variable data support | Approx. per-vial cost |
|---|---|---|---|---|
| Thermal transfer | High when resin, stock, and adhesive are matched | Repeated or moderate research runs | Strong | Depends on media, ribbon, and batch size |
| Laser | Moderate, subject to toner and stock testing | Low-volume batches | Good | Depends on sheet yield and setup |
| Inkjet | Variable, strongest with pigment and synthetic media | Short color-focused runs | Strong | Depends on ink, media, and printer |
| Pre-printed stock | Depends on stock and handwriting protection | Very small runs | Limited | Depends on order quantity and manual work |
The cost column should remain a procurement variable rather than a promised figure. Media waste, setup time, rejected labels, and verification labor can matter more than the nominal print cost.
Every method needs a printed-surface test. The harshest expected exposure should be applied to the complete label, followed by a human-readability check and a barcode scan. A code that scans before freezing but fails after wiping isn't production-ready.
Templates for 2 mL, 10 mL, Cryo, and Multi-Vial Kits
Templates should define priorities rather than lock a lab into one artwork file. The vial diameter, straight-sided body, closure, rack geometry, printer, and regulatory classification still need confirmation before release.
For a 2 mL autosampler vial, a compact wrap-around label can reserve the front panel for sample identity, lot, expiry where applicable, and a Data Matrix code. The side or rear area can carry storage and handling text if it remains readable. Hazard communication that cannot fit appropriately should move to the controlled outer package rather than shrink into unreadable type.
A 10 mL screw-thread vial generally allows a broader face. A flag-style format can create a flatter writing area for a human-entered barcode or short supplemental field, but the protruding edge must be checked against racks, trays, and adjacent containers. The face should still prioritize the identifier and traceability fields.
The cryogenic version should use synthetic face stock and an adhesive specified for the actual freezer or cryogenic exposure. A high-contrast print treatment, including white print on a translucent construction where suitable, can improve visibility against frost. A clear content window may help inspection, but it shouldn't compromise code contrast or create a weak label edge.
A multi-vial kit can carry the fuller compliance and handling information on the kit carton or enclosure card. Each vial then receives a compact individual identifier linked to the kit record. This structure supports the principle of less on the vial, more controlled information around it, provided the outer-packaging relationship is documented and remains intact.
| Vial format | Label size | Front-face content | Material | Compliance note |
|---|---|---|---|---|
| 2 mL autosampler vial | Compact wrap-around format sized to the straight body | Sample ID, lot, expiry where applicable, Data Matrix | Synthetic stock for cold or solvent exposure | Keep full hazard content on approved outer packaging when the vial cannot carry it legibly |
| 10 mL screw-thread vial | Wider face or flag-style format after fit testing | Product identity, lot, date, and human-readable fallback | Polyester or polypropylene according to handling | Check flag clearance in racks and trays |
| Cryogenic vial | Format matched to the cryovial body and cap area | Identifier, content window where useful, storage cue | Cryogenic synthetic stock with validated adhesive | Test after freezing, thawing, condensation, and handling |
| Multi-vial kit | Individual vial label plus kit-level carton label | Vial code linked to kit identity | Vial media matched to storage condition | Use the carton or enclosure for information that cannot fit safely on each vial |
The strongest template is the one that has passed a physical fit check, print test, environmental challenge, scan test, and regulatory review. A visually balanced label that fails any of those gates isn't ready for routine use.
Common Mistakes, Checklist, and FAQs for Vial Labels
Crowding a vial with information feels safer, but it can create a different hazard. Tiny text, compressed pictograms, curved barcodes, and overlapping fields may satisfy an artwork review while failing the researcher who needs to identify the container quickly.
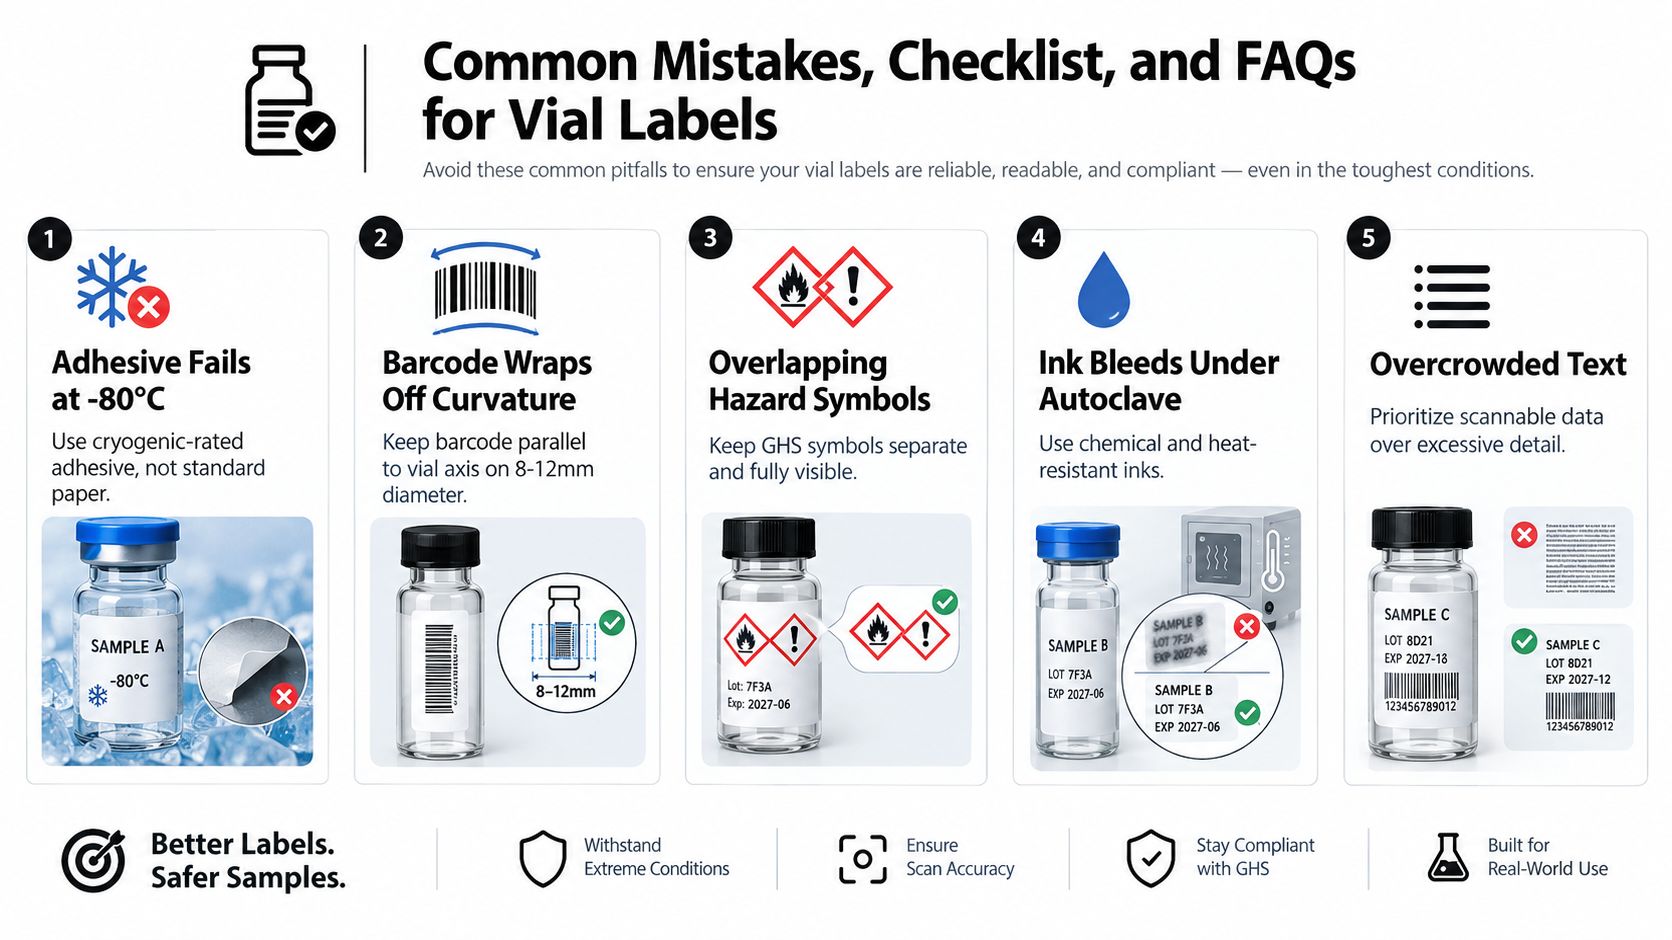
Five failures appear repeatedly in small-format workflows:
- Freezer mismatch: Standard adhesive can lift during freezing and condensation. Use media rated for the actual low-temperature exposure.
- Curved code placement: A barcode that crosses a tight curve may distort or lose its quiet zone. Keep machine-readable data in the flattest validated area.
- Overlapping hazard symbols: Separate pictograms and keep them visible when vials sit in racks.
- Autoclave ink failure: Steam and heat can cause ordinary ink to bleed or fade. Validate the print, not just the label stock.
- Outer-packaging omission: If the vial carries only a compact identifier, the carton, enclosure card, and controlled documentation must carry the delegated information consistently.
Before printing, a lab operator should confirm:
- Identity: The product or sample identifier is unambiguous.
- Traceability: Lot, batch, expiry, or date fields match the controlled record.
- Fallback: A person can read the critical information if the code fails.
- Adhesive: The construction matches freezing, thawing, wiping, sterilization, and storage.
- Geometry: The label stays on the straight body and doesn't cover the crimp or closure.
- Code quality: The code scans after the expected environmental challenge.
- Regulatory allocation: The vial, outer package, SDS, and enclosure card have defined responsibilities.
Frequently asked questions
How long do cryogenic labels last?
No universal lifetime applies. Performance depends on the adhesive, face stock, application temperature, dwell time, vial surface, storage condition, and number of freeze-thaw cycles. The laboratory should qualify the complete construction under its own workflow.
When does Data Matrix make more sense than a linear barcode?
A two-dimensional code can carry useful structured data in a compact area, but the choice depends on scanner capability, quiet-zone preservation, print resolution, and the laboratory database. A smaller code isn't automatically better if the curved glass makes it unreadable.
How should EU and US shipping labels work on a shared kit?
The kit should have a controlled labeling hierarchy. The vial can carry the identity needed at the bench, while jurisdiction-specific hazard and supplier information can appear on the appropriate outer package or enclosure when permitted. Regulatory staff should review the final distribution configuration.
Where should teams monitor rule changes?
The responsible regulatory function should monitor the applicable EU, UK, and US authorities and update controlled artwork, procedures, and training when requirements change. Small-container rules deserve particular attention because formatting and update obligations can evolve.
A compliant vial-labeling system connects the sticker, vial, carton, safety data sheet, inventory record, and recall process. The best design isn't the one with the most text. It's the one that keeps critical information readable, traceable, and available at every point where a person handles the material.
Herbilabs supplies research-use-only laboratory products in premium glass-vial formats, including reconstitution solutions and multi-vial options that can fit structured lot, expiry, and first-use tracking workflows. Visit Herbilabs to review the available vial formats and build a labeling system around the storage, traceability, and compliance needs of the laboratory.