Private Label, White Label, Wholesale partnerships available - EU, USA and UK - Free shipping from €75
Laboratory Equipment Sterilization: Best Practices & Safety
A culture plate looks clean until it doesn't. The failed run usually shows up late, after the media is poured, the reagents are open, and the team has already invested hours into setup. Then someone starts tracing backwards and finds the cause. A rushed rinse instead of a full wash. A plastic component autoclaved even though the manufacturer never approved steam. Indicator tape that changed color, but no one checked whether the load itself was suitable for that cycle.
That's where laboratory equipment sterilization stops being a housekeeping task and becomes a research control. It protects data, protects people, and protects expensive equipment from avoidable damage. For labs that supply others, including distribution partners and resellers, it also protects trust. If sterility is inconsistent, everything built on top of it becomes questionable.
Table of Contents
- Beyond Clean The Imperative of Sterility in Research
- The Foundations of Sterilization Key Principles and Terms
- The Workhorses Heat Sterilization Methods
- Choosing the Right Sterilization Method
- Specialized Methods for Sensitive Equipment
- Validation and Quality Assurance Proving Sterility
- Integrating Sterility into Your Workflow
Beyond Clean The Imperative of Sterility in Research
Most contamination events don't begin with a dramatic failure. They begin with a small shortcut. A flask looked visibly clean, so it was treated as ready. A technician disinfected an item but skipped a full sterilization cycle because the schedule was tight. A reused component sat too long before cleaning, and residue dried into places that later blocked full contact with the sterilant.
That distinction matters. Clean means visible soil has been removed. Disinfected means microbial burden has been reduced. Sterile means viable microorganisms have been eliminated to the required validated standard for the intended use. Those are not interchangeable states, and treating them as interchangeable is how labs lose reproducibility.
The process starts before the sterilizer is even turned on. According to the CDC guidance on healthcare equipment disinfection and sterilization, cleaning before sterilization reduces microbial load by at least 8 log₁₀ (99.999999%), with 4 log₁₀ reduction from pre-cleaning and an additional 4–6 log₁₀ from 20-minute chemical disinfection at 20°C. That single fact explains why dirty instruments can fail even when the autoclave cycle itself looks correct on paper.
Practical rule: Sterilization can't rescue poor cleaning. Residue shields microbes, traps air, blocks steam, and leaves teams with a false sense of security.
For research teams, the consequences go beyond contamination. Failed sterility control can force disposal of prepared media, invalidate assay results, damage sensitive parts, and trigger internal investigations that consume more time than the original work. For wholesalers and distribution partners, the same lapse can travel downstream as customer complaints, returns, or doubts about handling standards.
Good laboratory equipment sterilization isn't about making equipment look ready. It's about proving that equipment is ready for contact with samples, reagents, and results that matter.
The Foundations of Sterilization Key Principles and Terms
Before choosing a cycle, a team needs the right vocabulary. Sterilization failures often come from using familiar words loosely. In practice, the words define the limit of what a process can safely do.

What sterile actually means in practice
Sterility Assurance Level, usually shortened to SAL, is the confidence target behind a validated sterilization process. It isn't a visual judgment and it isn't the same as “probably fine.” It's a defined performance standard. In day-to-day work, teams should think of SAL like a certification threshold. If a cycle is validated to the required level for the device and load, the process is acceptable. If it isn't, the load is a risk, even if nothing looks wrong.
Bioburden is the starting contamination burden on an item before sterilization. A stainless-steel forceps cleaned immediately after use has a very different starting condition than a hinged instrument left to dry with protein residue inside the joint. Lower bioburden makes sterilization more reliable. Higher bioburden demands more from the process and raises the chance of failure if cleaning, packaging, or loading is poor.
The terms that matter on the bench
A few technical terms are worth understanding because they influence real operating decisions:
- Material compatibility means the item can tolerate the method without warping, cracking, corroding, fogging, or absorbing harmful residues.
- Cycle validation means the sterilization process has been demonstrated to work for that load type, not just for the machine in general.
- Exposure time is only meaningful if the correct temperature, pressure, concentration, or contact conditions are reached.
- Penetration refers to whether the sterilant reaches internal channels, wrapped surfaces, lumens, threads, and packed areas of the load.
A useful way to explain this to new staff is to compare sterilization to painting a complex object. It's easy to coat a flat surface. It's much harder to reach a hinge, the inside of tubing, or a nested stack of glassware. Sterilants behave the same way. Accessibility matters.
Physical settings on the display don't automatically mean the load was sterilized. They only show what the chamber delivered, not what every surface received.
Three habits separate reliable teams from careless ones:
- They identify the item first. Glass, stainless steel, polypropylene, rubber, optical surfaces, and electronics cannot be treated as one category.
- They read the IFU before selecting a method. The safest method isn't always the hottest method.
- They document the exact cycle and load condition. Repeatability depends on using the same validated setup, not a rough approximation.
Laboratory equipment sterilization works best when teams stop asking “What's the strongest method?” and start asking “What method is validated for this exact item and this exact use?”
The Workhorses Heat Sterilization Methods
Heat remains the most practical and dependable option for a large share of routine laboratory equipment sterilization. When the material allows it, heat-based methods are straightforward to validate, easy to monitor, and widely understood by staff. The two main categories are moist heat in the autoclave and dry heat in an oven. They are not interchangeable.

Autoclaving done correctly
An autoclave works because pressurized steam transfers heat efficiently and penetrates better than dry air. Boiling water alone won't reliably sterilize many lab loads. Pressurized steam changes the equation by driving lethal heat into surfaces and enclosed spaces more effectively.
The Pobel sterilization guide states that the standard autoclave protocol for laboratory equipment is 121°C under 15 psi for 15 to 30 minutes, and that this achieves a 100% kill rate of even the most resistant microbial spores. The same guidance notes that liquids under 500 mL require 30 minutes, while 2–4 liters require 55 minutes. That's why one standard liquid cycle rarely fits every bottle on a shelf.
A useful training point is that the timer should match the load, not staff convenience. Small media bottles, large carboys, wrapped instruments, and densely packed waste all behave differently under steam.
A quick visual reference helps reinforce the point:
Where dry heat still earns its place
Dry heat is slower because air transfers heat less efficiently than saturated steam. Still, it has a legitimate role. It suits materials that can tolerate high temperature but shouldn't be exposed to moisture, such as some glassware, certain metal items, powders, and oils.
The Brookline College sterilization overview notes that dry heat at 170°C for 60 minutes is viable for glass and metal, but unsuitable for most polymers due to the thermal burden. That trade-off matters. Teams sometimes choose dry heat because it feels gentler than steam, but for many plastics it is more destructive.
Use dry heat because the material requires a moisture-free process, not because the oven happens to be available.
Common loading mistakes that ruin a cycle
Most autoclave problems are loading problems before they are equipment problems. Three appear constantly in mixed-use labs:
- Overpacked chambers block steam circulation. Items in the center of a dense load may never receive the same exposure as items at the edge.
- Closed containers prevent proper penetration and create pressure hazards.
- Mixed materials in one cycle lead to uneven results. A cycle chosen for borosilicate glass may deform polypropylene lids or compromise seals.
A simple bench-side checklist prevents many failures:
| Load issue | What goes wrong | Better practice |
|---|---|---|
| Tight stacking | Steam or hot air can't circulate properly | Space items to allow full exposure |
| Wrong container closure | Pressure equalization fails | Loosen caps or use approved vented setups |
| Large liquid volume on short cycle | Core temperature lags behind chamber temperature | Match cycle time to volume |
| Heat-sensitive plastics added to routine load | Warping, cracking, seal damage | Segregate by material and validated method |
Heat sterilization is dependable because it is unforgiving. If the load is prepared correctly, it works very well. If the load is assembled carelessly, the same cycle can produce a false pass that only gets discovered after contamination or equipment damage.
Choosing the Right Sterilization Method
Method selection should be treated like a release decision, not a guess. The wrong choice damages equipment, wastes cycle capacity, and creates the worst kind of lab risk: the belief that an item is sterile when it isn't.
One source of that failure is simple noncompliance with manufacturer instructions. The Consteril guidance on sterilizing medical equipment states that 40% of sterile processing failures stem from ignoring IFUs. For heat-sensitive items, that isn't just a paperwork issue. It's a direct path to warped plastics, degraded optics, failed seals, and ineffective cycles.
The four questions that decide the method
A practical decision framework starts with four questions.
What is the item made of?
Borosilicate glass, stainless steel, silicone, polypropylene, rubber, coated electronics, and optical assemblies all respond differently to heat, moisture, and oxidizing agents. If the answer is “mixed materials,” the team should assume the most sensitive component governs the method.
What will damage it first?
Some items fail under heat. Others fail under moisture, pressure, or chemical exposure. A plastic pipette may deform in steam. An optical component may haze. A rubber seal may absorb gas residues or lose elasticity after repeated cycles.
What geometry must the sterilant reach?
Flat open surfaces are simple. Hinges, long channels, threads, narrow lumens, porous wraps, and nested assemblies are not. Penetration often matters more than raw cycle intensity.
What use comes next?
An item used in a low-risk prep step and an item contacting critical reagents don't carry the same operational tolerance. The stricter the downstream application, the less room there is for improvisation.
Method comparison for real lab decisions
The table below is a practical way to compare methods before a load is assembled.
| Method | Best for | Poor fit for | Main strength | Main caution |
|---|---|---|---|---|
| Autoclave moist heat | Glassware, many metal instruments, some validated liquids | Heat-sensitive plastics, electronics, moisture-sensitive items | Reliable, familiar, efficient steam penetration | Wrong load setup causes incomplete exposure or material damage |
| Dry heat | Glass, certain metal tools, oils, powders | Most polymers, moisture-safe loads that steam could handle better | No moisture contact | Long thermal exposure and limited material compatibility |
| Ethylene oxide gas | Complex heat-sensitive items, many plastics, mixed geometries | Items that can be safely steam sterilized | Deep penetration without high heat | Toxic residues require aeration and strict controls |
| Vaporized hydrogen peroxide | Heat- and moisture-sensitive equipment compatible with the process | Some highly resistant spore challenges without extended exposure | Faster cycles and no toxic residuals | Material and geometry limits still apply |
| Filtration | Heat-labile liquids and solutions | Solid instruments, enclosed surfaces | Preserves heat-sensitive formulations | It sterilizes the fluid, not the container handling around it |
A good rule for managers and distributors is simple. If a team can't identify the material, can't find the IFU, or can't verify the validated cycle, the item shouldn't be released as sterile.
Ignoring the IFU usually happens for one of two reasons. Staff assume “standard autoclave” is universal, or they rely on habit from a different product line. Both are expensive mistakes. The right method is the one that preserves function and delivers validated sterility together. One without the other is failure wearing a lab coat.
Specialized Methods for Sensitive Equipment
Not everything belongs in an autoclave. Modern labs handle plastic assemblies, sealed components, tubing sets, optical surfaces, elastomers, and electronics-adjacent equipment that won't tolerate steam. These items need methods designed around lower temperature and better material compatibility.

When gas sterilization is the right answer
For heat-sensitive equipment with complex geometry, ethylene oxide (EtO) remains a major tool. The FDA page on medical device sterilization states that approximately 50% of all sterile medical devices produced in the United States are sterilized using EtO gas. That dominance comes from one practical advantage. EtO penetrates places steam often can't reach safely in delicate materials.
The Brookline College overview of sterilizing laboratory equipment adds the operational details: EtO sterilizes by alkylation, works at 30–35°C with a 4-hour cycle and SAL of 10⁻⁶, and then requires 12–24 hours of aeration to remove toxic residues absorbed by equipment. That last part is the trade-off many teams underestimate. EtO can solve the heat problem, but it creates a residue-management problem that cannot be rushed.
That's why EtO is best reserved for loads for which it is specifically required. Using it for heat-stable items slows throughput and adds unnecessary handling burden.
Vaporized hydrogen peroxide and filtration
Vaporized hydrogen peroxide, often written as VH₂O₂ or VHP, has become attractive for lower-temperature workflows because it offers faster turnaround and leaves no toxic residuals. The same Brookline source notes that it is FDA-recognized as an Established Category A process under ISO 22441:2022 and that typical cycles are around an hour. Its limitation is practical, not theoretical. Some highly resistant spore challenges may require extended exposure, and not every geometry or material set is suitable.
For liquids, gas methods aren't the answer at all. Sterile filtration is. If a buffer, media component, or reagent won't tolerate heat, filtration through a validated sterile membrane preserves the chemistry while removing microbial contamination from the fluid path. The critical caution is that filtration only controls the liquid passing through the system. The receiving vessel, cap, tubing, and transfer technique must also be sterile or aseptic.
A concise reference for handling one common lab need is this guide on how to make sterile water. The same logic applies to other heat-labile lab solutions. The fluid may be made sterile successfully, but poor downstream handling can undo that result immediately.
Sensitive equipment should drive method choice. Teams should never force a steam solution onto a material that clearly requires gas, peroxide, or filtration.
Other niche options and their limits
A few specialized methods appear in advanced or niche settings:
- Chlorine dioxide gas can be effective under defined conditions and has appealing residue characteristics, but healthcare clearance limitations restrict routine use in many environments.
- Radiation-based sterilization is valuable in industrial settings for packaged disposables, but it isn't a typical in-house laboratory option.
- Chemical immersion can support high-level disinfection for certain items, yet it demands strict compatibility, contact time control, rinsing decisions, and a clear understanding that disinfection and sterilization are not the same endpoint.
Sensitive equipment usually fails in predictable ways. Plastics deform. Adhesives weaken. Lenses fog. Rubber components harden or absorb residues. Teams that choose specialized methods early avoid those failures and keep expensive equipment in service longer.
Validation and Quality Assurance Proving Sterility
Running a cycle and proving sterility are different tasks. Many labs document the first and assume the second. That gap is where hidden contamination survives.

What each type of indicator actually proves
The most useful way to teach monitoring is as a hierarchy.
Physical indicators are the machine records. They show time, temperature, pressure, or other process parameters. They answer, “Did the sterilizer run the programmed cycle?”
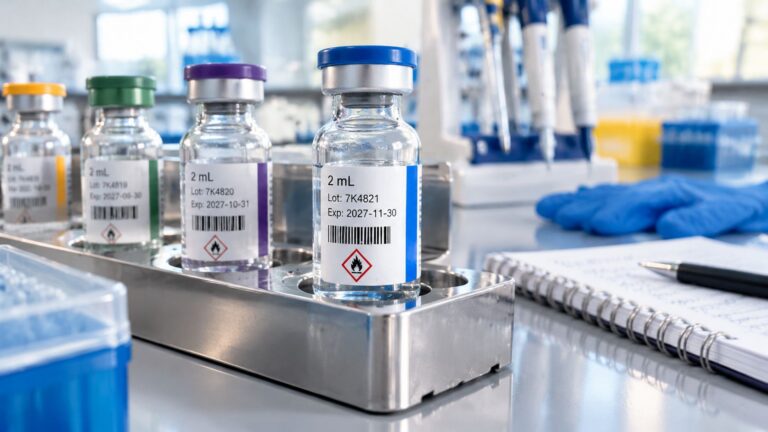
Chemical indicators react to exposure conditions. Indicator tape and internal strips are useful because they show that a package or tray encountered certain process conditions. They answer, “Did this location see the required environment?”
Biological indicators go further. They challenge the process with resistant spores and show whether the cycle achieved microbial kill under test conditions. They answer, “Did the process work?”
That hierarchy matters because teams often overtrust color change on tape. Tape is helpful. It is not proof of sterility by itself.
| Validation tool | What it confirms | What it cannot confirm alone |
|---|---|---|
| Physical indicator | Cycle parameters were reached by the machine | That every item in the load was sterilized |
| Chemical indicator | Specific exposure conditions occurred at the indicator location | Actual microbial kill |
| Biological indicator | The process killed a resistant biological challenge | Full routine compliance if used without proper documentation |
Chemical indicators show exposure. Biological indicators show effectiveness.
Why routine biological monitoring gets skipped
The CDC sterilizing practices page leaves a practical grey area for many non-clinical research settings, and that has consequences. The same source notes a lack of standardized routine bio-monitoring guidance for research contexts, and reports that 65% of labs skip routine biological indicators due to cost and complexity, creating a risk of hidden contamination.
That figure aligns with what quality managers often see operationally. Biological monitoring takes planning, incubator access, documentation discipline, and someone who owns the process. When no one owns it, it gets deferred.
A stronger approach is to treat biological indicators as part of release confidence, especially after relocation, maintenance, failed loads, unusual load configurations, or onboarding of new staff. For labs tightening oversight, this overview of quality control testing practices is a useful companion to equipment-focused validation.
Three habits improve validation without overcomplicating workflow:
- Match the indicator to the process. Steam, gas, and peroxide cycles don't use one universal challenge.
- Place indicators where failure is most likely. The hardest-to-penetrate area is usually more informative than the easiest.
- Investigate deviations immediately. Repeating a cycle without understanding the cause only buries the problem.
Sterility isn't proven by confidence, habit, or a signed logbook. It's proven by monitored, documented, validated performance.
Integrating Sterility into Your Workflow
Sterile equipment alone doesn't create sterile work. A perfectly processed glass vial can be compromised by a non-sterile diluent, an exposed transfer step, poor glove discipline, or a pipette tip box handled carelessly after opening.
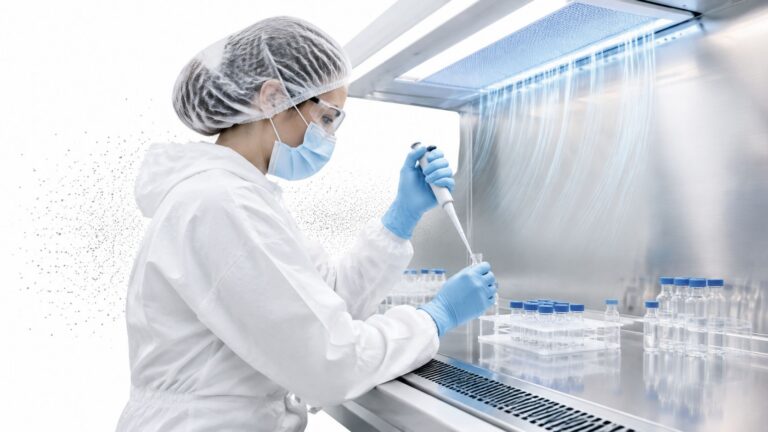
That's why strong labs treat sterility as a chain of custody. The chain starts with cleaning and validated laboratory equipment sterilization, but it continues through storage, transport, setup, reagent preparation, dispensing, and waste segregation. If one link fails, the rest of the process inherits the risk.
Aseptic workflow should be visible in routine habits:
- Separate clean and dirty flow paths. Don't let processed items cross back into prep areas with used materials.
- Protect sterile status after processing. Packaging, storage conditions, and handling discipline matter as much as the cycle itself.
- Audit transfer steps. Most contamination enters during opening, pouring, pipetting, and recapping.
- Train for consistency. The best SOP fails when every operator improvises a different version.
For teams reviewing their wider contamination control practices, this guide on how to prevent cross contamination connects equipment handling with the rest of the aseptic workflow.
Reliable research depends on process discipline that starts before the sterilizer and continues after it. That mindset protects equipment, preserves results, and keeps routine work from becoming a preventable investigation.
Herbilabs supports research teams, wholesalers, and distribution partners with high-purity reagents and sterile diluents built for controlled laboratory workflows. To review available RUO lab supplies, sterile water options, and supporting documentation, visit Herbilabs.