Private Label, White Label, Wholesale partnerships available - EU, USA and UK - Free shipping from €75

How to Mix Peptides with Bacteriostatic Water Safely
A lyophilized peptide vial looks simple until the seal comes off. The powder is stable, compact, and expensive. The moment bacteriostatic water enters that vial, the work shifts from storage to handling, and small technique errors start to matter. A rushed injection angle, a poorly chosen dilution, or unmanaged vial pressure can turn a clean reconstitution into foam, sample loss, or inaccurate downstream dosing.
That's why how to mix peptides with bacteriostatic water isn't just a routine prep task. It's a control point for sterility, concentration accuracy, and repeatable research outcomes. Teams that treat reconstitution as a formal method, not a casual step, usually avoid the errors that consume time later.
Table of Contents
- The Critical First Step in Peptide Research
- Assembling Your Reconstitution Toolkit
- Calculating Dilution for Precise Dosing
- A Methodical Protocol for Peptide Mixing
- Post-Reconstitution Storage and Stability
- Troubleshooting Common Mixing Problems
The Critical First Step in Peptide Research
A researcher usually notices the risk at the same point. Gloves are on, the vial is in hand, the powder is intact, and the next few minutes will decide whether that material becomes a clean, usable solution or a preventable problem.
Reconstitution sits at the front end of nearly every peptide workflow, but it behaves like a quality checkpoint. If the concentration is off, the dosing is off. If the vial is contaminated, every later step inherits that error. If the powder is hit with force, shaken aggressively, or exposed to poor handling, the solution may never behave the way the protocol assumes.
That's why the process needs to be treated as a method, not a habit. Good labs don't rely on memory for this step. They rely on clean setup, calculation discipline, sterile handling, and a repeatable injection technique that protects both the peptide and the person drawing it later.
Practical rule: The easiest time to prevent dosing error is before the first milliliter enters the vial.
In research settings, peptide handling also has to stay inside the proper use framework. Anyone purchasing or distributing reagents should understand the distinction laid out in Herbilabs' guidance on Research Use Only products. That matters because labeling, handling expectations, and documentation standards should align with research workflows from the start.
The same principle applies to reagent choice. Sterile diluent quality, container integrity, and basic handling discipline aren't side details. They are part of the validity chain. When the vial contains a sensitive lyophilized material, the reconstitution step is where sloppy technique becomes visible.
Assembling Your Reconstitution Toolkit
Preparation starts before the needle touches either stopper. The right setup reduces rushed decisions, and rushed decisions are where contamination, miscalculation, and pressure mistakes usually begin.

Build the workspace before opening anything
A clean reconstitution area doesn't need to be elaborate, but it does need to be controlled. The surface should be clean, dry, and free of unrelated supplies. Air movement matters more than many people think. Drafts, busy benches, and repeated hand traffic all raise the chance of contamination during a task that often takes only a few minutes.
Before setup is complete, both vials should be allowed to reach room temperature. One technical guide specifies 18–25°C and suggests about 15–20 minutes from refrigerator storage or 30–40 minutes from freezer storage to reduce condensation and thermal shock during reconstitution, as described in this peptide reconstitution temperature guidance. That step is easy to skip, but chilled vials often create avoidable handling issues.
A typical sterile field should include:
- The peptide vial: Verify the label and vial mass before anything else. Never calculate from memory.
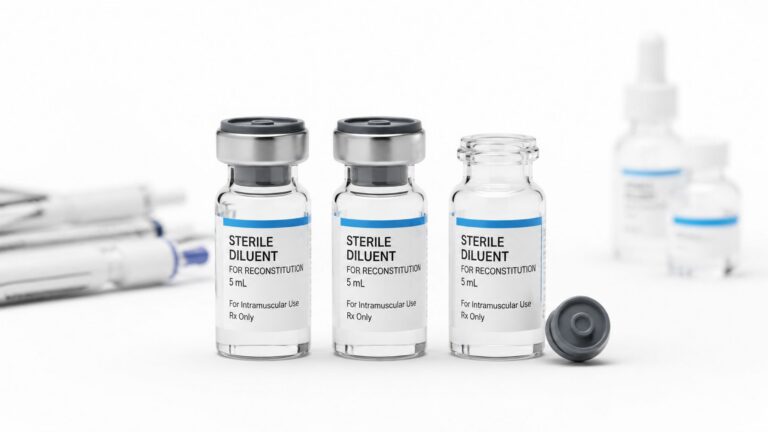
- Bacteriostatic water: Use a sterile, sealed diluent intended for reconstitution work, such as Herbilabs reconstitution solution in a 3 mL vial.
- Sterile syringe and needle: Choose a combination that gives control during both withdrawal and injection.
- Alcohol prep pads: Use fresh pads for each stopper. One wipe for both vials is poor practice.
- Sharps disposal container: It should already be within reach before the first puncture.
Choose tools for control, not convenience
The most common equipment mistake isn't dramatic. It's using whatever syringe is nearby, then wondering why the draw feels rough or the injection goes in too fast. Reconstitution is easier when the operator can measure the planned volume clearly and control plunger force without overshooting.
A good setup prioritizes:
| Item | What matters |
||—|
| Syringe | Clear graduations and stable plunger movement |
| Needle | Enough control to inject slowly down the vial wall |
| Alcohol pads | Individually wrapped and used once per contact point |
| Workspace | Clean, low-traffic, and organized before puncturing seals |
Clean technique starts with fewer hand movements. If the operator has to search for a swab after drawing diluent, the setup was incomplete.
This part of the workflow feels basic, but it prevents many downstream problems. Reconstitution usually goes wrong long before the solution looks wrong.
Calculating Dilution for Precise Dosing
A peptide vial can be reconstituted cleanly and still produce bad data if the concentration was chosen poorly at the start. I see this most often when someone picks a familiar volume first, then tries to make the dosing work around it. That approach creates awkward syringe readings, avoidable pressure problems during injection, and preventable dosing error later.
Set the target concentration first. Then calculate the volume needed to reach it.
Start with concentration, then solve for volume
The working formula is simple:
Volume to add = peptide amount ÷ target concentration
If a vial contains 10 mg of peptide and the target concentration is 2 mg/mL, the required reconstitution volume is 5 mL. The arithmetic is easy. The judgment call is choosing a concentration that fits the protocol and the tools used to measure each dose.
That choice has practical consequences inside the vial. Larger reconstitution volumes can make dose measurement easier because each intended dose occupies more syringe space. They also increase the amount of fluid entering a small sealed vial, which means pressure management matters more during transfer. Smaller volumes keep the solution concentrated, but they can force the operator to measure very small draws where a slight plunger error changes the dose more than expected.
Write the units out every time. If the vial is labeled in milligrams and the dosing plan is tracked in micrograms, convert before calculating anything. A calculation written as 5 mg in one line and 500 mcg in the next is how labeling mistakes start.
Example reconstitution volumes for a 5 mg peptide vial
A 5 mg vial contains 5000 mcg of peptide. Divide 5000 mcg by the target concentration to determine how much bacteriostatic water to add.
| Target Concentration | Calculation (5000 mcg / Concentration) | Bacteriostatic Water to Add |
|---|---|---|
| 1000 mcg/mL | 5000 / 1000 | 5 mL |
| 2000 mcg/mL | 5000 / 2000 | 2.5 mL |
| 2500 mcg/mL | 5000 / 2500 | 2 mL |
| 5000 mcg/mL | 5000 / 5000 | 1 mL |
These numbers show the trade-off clearly. A 1 mL reconstitution gives a concentrated vial, but each dose may require a very small draw. A 5 mL reconstitution gives more readable syringe volumes, but it also puts more air and liquid through the stopper during mixing, which raises the chance of vacuum lock or fluid pushback if pressure is ignored.
That detail is often missed in short protocols. The calculation does not end with the right volume on paper. The chosen volume also changes how difficult the physical reconstitution will be in a sealed vial.
Common calculation mistakes that distort dosing
The expensive mistakes are usually basic process failures, not difficult math.
- Mixing mg and mcg without converting: A vial labeled in mg must match a dosing plan written in mcg/mL before any volume is calculated.
- Choosing a “standard” water volume first: Common volumes are only starting points. The peptide amount and target concentration determine the correct final volume.
- Ignoring the syringe scale used later: A concentration can be mathematically correct and still be impractical if the intended dose sits between markings or requires a tiny draw.
- Forgetting vial capacity and pressure effects: A small lyophilized peptide vial may not handle large-volume transfer comfortably unless air pressure is equalized during the process.
- Failing to label the final concentration after reconstitution: If the vial only says the peptide name, the next person has to guess or recalculate.
Good dilution math produces a concentration that can be measured accurately and reconstituted without fighting the vial.
The safest workflow is straightforward. Decide the target dose per draw, calculate the concentration that makes that draw measurable, confirm the vial can accept the planned volume, and document the final concentration immediately. That sequence prevents both dosing confusion and the pressure-related handling problems that show up once the needle enters the stopper.
A Methodical Protocol for Peptide Mixing
The physical act of reconstitution should feel controlled from start to finish. Most peptide losses happen when an operator moves too fast, injects too forcefully, or ignores the pressure changes created inside small sealed vials.
The sequence below keeps the process stable and gives special attention to the pressure equalization problems many quick guides barely mention.

The sterile sequence that protects the vial
Start with both vials at room temperature and the workspace already assembled. Swab both stoppers with fresh alcohol pads and allow them to dry. Don't wipe and puncture immediately if the surface is still wet.
Then move through the procedure in order:
- Withdraw the calculated volume of bacteriostatic water. The syringe should match the planned volume closely enough for easy reading.
- Insert the needle into the peptide vial at an angle. The goal is to direct fluid onto the inside wall, not directly onto the powder cake.
- Inject slowly. Slow flow reduces foam and keeps the peptide from being hit with unnecessary force.
- Let the solution settle. If the powder doesn't dissolve immediately, leave it alone briefly rather than escalating to shaking.
- Gently swirl only. Rolling or light swirling helps dissolution. Shaking doesn't.
This sterile workflow is consistent with technical guidance that recommends disinfecting both stoppers, drawing the calculated diluent volume, injecting it slowly down the inside wall of the peptide vial rather than onto the powder, and using gentle swirling only because vigorous agitation can promote aggregation or degradation, as outlined in this technical peptide mixing protocol.
A short visual reference can help reinforce the handling sequence:
Where pressure errors begin
Pressure changes the moment fluid enters a sealed vial. That sounds obvious, but many operators only think about pressure when withdrawing from the bacteriostatic water vial. They inject air there, draw the diluent, and assume the hard part is finished.
It isn't.
The peptide vial has now become its own pressure system. As liquid enters, internal pressure can rise. If the operator injects quickly, removes the needle abruptly, or later tries to draw from an unbalanced vial, the result can be plunger resistance, uneven withdrawal, spray-back, or apparent dose inconsistency.
A vial can be sterile and still be poorly managed. Pressure errors don't always look dramatic, but they affect handling immediately.
How to vent and draw without fighting the plunger
Pressure management works best when it's treated as part of the reconstitution technique, not as a rescue step after something feels wrong.
Use this approach:
- When drawing diluent from the bacteriostatic water vial, balance withdrawal with appropriate air entry. That prevents vacuum formation in the source vial.
- When injecting into the peptide vial, slow down near the end of the plunger stroke. Fast final pressure loading is a common cause of blowback.
- Keep the needle under the stopper briefly after injection rather than snapping it out immediately. That gives the vial a moment to settle.
- If resistance develops later during dose withdrawal, don't force the plunger. Resistance often points to pressure imbalance, not thick solution alone.
- If the vial is clearly over-pressurized, manage that gently. The objective is controlled equalization, not abrupt venting that risks sample loss or aerosol formation.
This is one of the most overlooked details in peptide preparation. Pressure equalization is often mentioned in passing, but operators need to understand the practical signs of imbalance: the plunger moving on its own, unusual resistance, sudden release, or liquid behavior that doesn't match the expected volume draw.
For anyone learning how to mix peptides with bacteriostatic water safely, this is the step that separates a smooth multi-dose workflow from a frustrating one. Calculation determines what concentration should exist. Pressure management determines whether that concentration can be accessed accurately from the vial.
Post-Reconstitution Storage and Stability
A peptide doesn't become low-risk once it's dissolved. In many labs, the biggest handling drift appears after successful reconstitution, when the vial starts getting treated like a finished product instead of a sensitive solution.

Storage discipline matters after the powder dissolves
Once reconstituted, the vial should be stored under consistent refrigerated conditions and handled as little as possible outside scheduled access. Light exposure, repeated warming and cooling, and careless stopper handling all create unnecessary risk.
The practical storage rules are simple:
- Keep the vial refrigerated after reconstitution.
- Store it upright when possible.
- Protect it from avoidable light exposure.
- Label the vial clearly with concentration and reconstitution date.
- Use clean technique every time the stopper is accessed.
Bacteriostatic water is chosen in part because it contains a preservative system that supports multi-use handling, but that doesn't excuse sloppy storage. Refrigeration and disciplined access still matter because contamination risk and solution instability are driven as much by user behavior as by the diluent.
What to monitor between uses
Between draws, the vial should remain visually consistent. If appearance changes, the safest assumption is that something in the handling chain changed too.
Check for:
| Observation | What it means practically |
|---|---|
| Solution remains clear | Handling has likely been stable so far |
| New haze or visible matter | Reassess before any further use |
| Frequent stopper damage | Sterility risk increases with repeated rough access |
| Inconsistent withdrawal feel | Revisit pressure handling and storage practices |
Labs that want fewer avoidable losses usually standardize storage behavior, not just the initial mixing method. Herbilabs also outlines broader storage practices for bacteriostatic water that align with this point. Consistency after reconstitution protects the value created during reconstitution.
Troubleshooting Common Mixing Problems
Troubleshooting starts with one question. Is the problem in the solution itself, or in the vial mechanics during access? Those are different failure modes, and treating them as the same is how good material gets wasted.

Cloudiness, particles, and incomplete dissolution
A properly reconstituted peptide should look uniform. If it turns hazy immediately after diluent addition, separate transient bubbles from true insolubility or contamination before doing anything else.
Several handling errors cause this:
- Diluent was pushed in too fast: Rapid flow can foam the contents and disturb the powder instead of wetting it gradually.
- The vial or diluent was too cold: Dissolution can slow down enough to mimic a mixing failure.
- The vial was disturbed too soon: Some lyophilized cakes need time to hydrate fully before the solution clears.
Use a simple check sequence:
- Set the vial down and let it rest briefly at room temperature.
- Swirl gently only if the powder has mostly wetted. Do not shake.
- Inspect under good light against a plain background.
- Stop if cloudiness, strands, or visible particles remain.
Persistent visual defects are not a cue to mix harder. They are a cue to stop using that vial until the cause is identified.
Plunger resistance, vacuum lock, and spray-back
This is the failure point many protocols skip. A vial can look perfect and still give inaccurate draws because the internal pressure is wrong.
The pattern is usually easy to recognize:
- The plunger drags or sticks during withdrawal
- Liquid enters the syringe in jumps instead of a smooth pull
- The stopper seems to push back
- The vial releases a small spray or surge when pressure changes
- Successive draws from the same vial feel inconsistent
These problems come from pressure imbalance inside a sealed container. During reconstitution, fluid enters the vial and gas volume changes. If that pressure is not equalized deliberately, the vial can develop positive pressure, partial vacuum, or an unstable middle state that changes from draw to draw. In small research vials, that is enough to distort withdrawal feel and alter measured volume.
The trade-off is straightforward. Adding or venting pressure too aggressively can cause spray-back, foaming, and sample loss. Ignoring pressure altogether leads to plunger resistance, vacuum lock, and inconsistent dosing. Good technique sits between those two errors.
Handle it methodically:
- Pause and confirm needle position first. A needle tip buried in the stopper edge or pressed against glass can mimic pressure trouble.
- Keep the vial upright and the syringe steady. Sudden angle changes make pressure effects worse.
- Equalize pressure in small increments. Do not force the plunger.
- Withdraw slowly and watch how the barrel fills. Smooth entry usually means the vial pressure is under control.
- If the vial repeatedly pushes fluid back or resists withdrawal, stop and reassess the reconstitution setup before the next draw.
I treat unexplained plunger resistance as a measurement problem first, not a strength problem. Once operators start forcing the syringe, they stop measuring accurately. That is where dose drift, bent needles, stopper damage, and lost volume usually begin.
Herbilabs provides sterile diluents and reconstitution supplies for research workflows across the EU, UK, and USA. For teams sourcing lab-ready materials for peptide handling, Herbilabs is one option to review alongside internal quality requirements and documented SOPs.